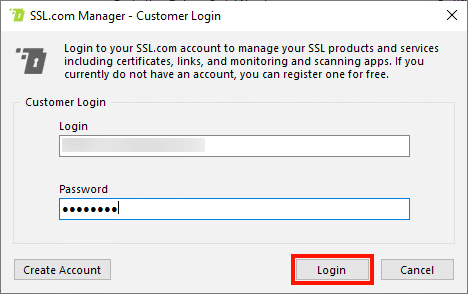
- After installing and launching SSL Manager, choose Account >> Customer Login from the menu.
- Next, enter your Login and Password, then click the Login button.
Note: if you do not have an account yet, you can create one now via the Create Account button.
- Choose the team you wish to view, then click the OK button.
- A dialog box will appear indicating that access to the team’s information requires approval. Click the OK button to dismiss the alert.
- Log into your SSL.com account portal and go to the Orders tab. Make sure that the team you want to use is set as the Current Team.
- Click the SSL Managers link, located in the left sidebar under Quick Links.
- Select the instance of SSL Manager that needs to be approved (it will have “Pending” in the Status column), then select Approve from the drop-down menu at the top left.
- An alert will appear asking if you are sure you want to approve the SSL Manager. Click the OK button if you are sure.
- The page will reload, and the SSL Manager instance you approved will show a status of Active.
- Return to SSL Manager and repeat steps 1-3 above to login and choose a team. You can confirm that you are logged in by checking the Account menu. Your available funds will also be shown at the top of the window.
Thank you for choosing SSL.com! If you have any questions, please contact us by email at Support@SSL.com, call 1-877-SSL-SECURE, or just click the chat link at the bottom right of this page. You can also find answers to many common support questions in our knowledgebase.