This how-to will walk you through generating a certificate signing request (CSR) in Vesta Control Panel (VestaCP). VestaCP is a lightweight open-source control panel offered by several web hosts, including Namecheap and AWS.
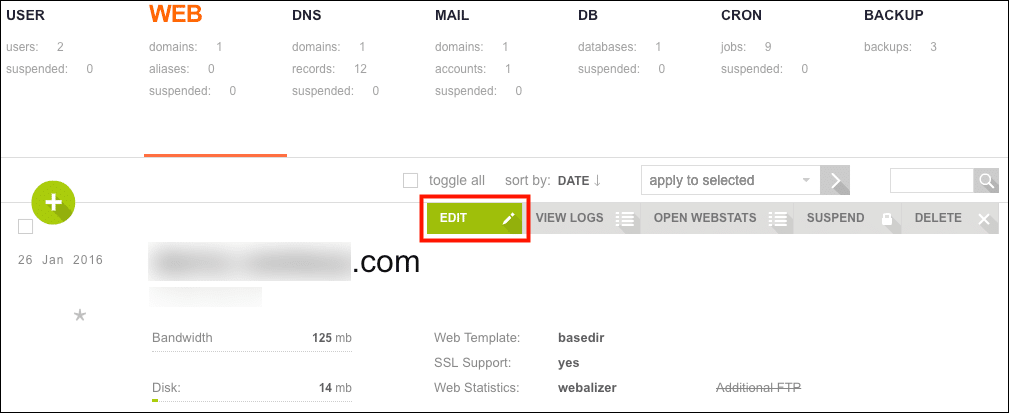
- Click the WEB tab.
- Scroll down to the domain you want to generate a CSR for and hover over it, then click the EDIT button.
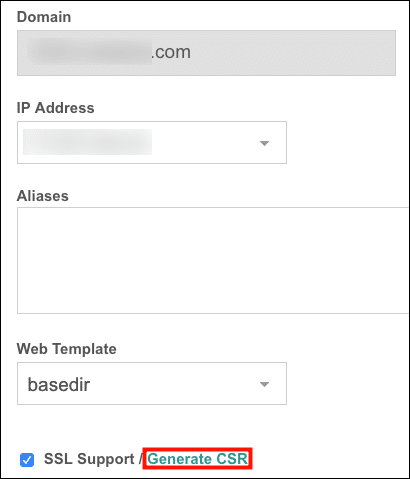
- Click Generate CSR.
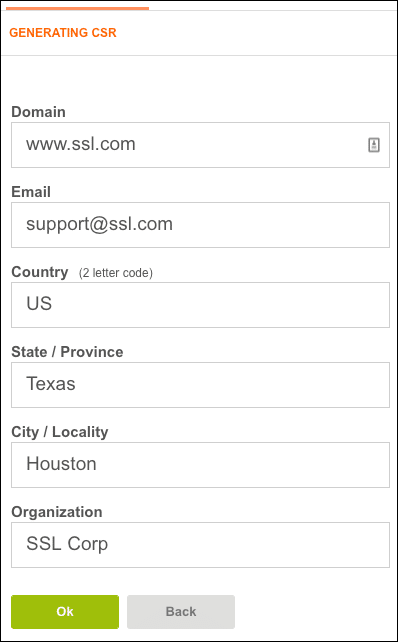
- A new browser tab will open. Enter the following information into the form:
- Domain: The Fully Qualified Domain Name (FQDN) of the website this certificate will protect. Depending on the certificate type, this may be a wildcard, such as
*.example.com. - Email: A contact email address.
- Country: A two-letter country code.
- State / Province: This field requires a full name, not an abbreviation.
- City / Locality: The name of your city or town.
- Organization: The name of your company or organization.
- Domain: The Fully Qualified Domain Name (FQDN) of the website this certificate will protect. Depending on the certificate type, this may be a wildcard, such as
- When you are finished filling out the form, click the Ok button.
- A window will appear with fields containing your CSR, a (self-signed) certificate, and your private key. For instructions on submitting your CSR to SSL.com, please read our guide to CSR submission. When you are ready to install your signed certificate, please check our how-to on certificate installation in Vesta Control Panel.
Note: Even though a message reading “Certificate has been generated successfully,” this is a self-signed certificate. For public-facing websites you will still need to submit your CSR to a certificate authority for signing.
Next Steps
For help installing your certificate, read here.
Thank you for choosing SSL.com! If you have any questions, please contact us by email at Support@SSL.com, call 1-877-SSL-SECURE, or just click the chat link at the bottom right of this page. You can also find answers to many common support questions in our knowledgebase.


