Effective June 1, 2023, SSL.com has updated its key storage protocols for code signing certificates to comply with new guidelines issued by the Certificate Authority/Browser (CA/B) Forum. Now, private keys must be secured in encrypted USB tokens, on-site FIPS-compliant hardware security modules (HSM), or via cloud-based HSM services. Among the supported cloud HSM options, Microsoft Azure Key Vault (Premium Tier) stands out as a robust choice for storing private keys and generating Certificate Signing Requests (CSRs).
When applying for a signing certificate with SSL.com, the process includes generating a Certificate Signing Request (CSR) which serves as a formal request for SSL.com to validate and bind your identity to a signing certificate. The following sections demonstrate how to generate a CSR in Azure Key Vault (Premium Tier).
Prerequisites
- An Azure Key Vault (Premium Tier). The Azure Key Vault service tier that should be used for this process is Premium because it is FIPS 140-2 Level 3 validated.
- For instructions on how to create an Azure Key Vault, please refer to the next section: Create an Azure Key Vault.
- If you already have an existing Azure Key Vault, please proceed to the other section: Generate a Certificate Signing Request in Azure Key Vault.
- A signing certificate order from SSL.com.
For a complete list of cloud HSMs that SSL.com supports for code signing, please refer to this article: Supported Cloud HSMs for Document Signing and Code Signing.
Create an Azure Key Vault
- Sign into the Azure portal.

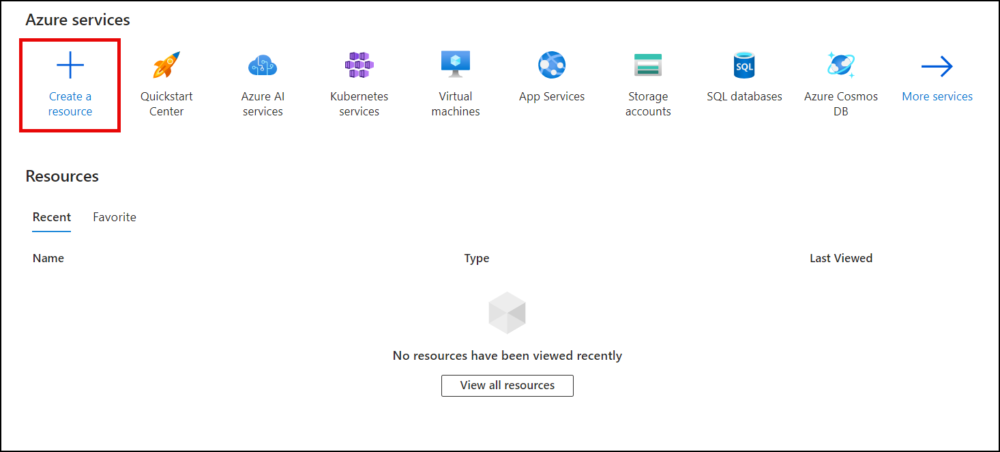
- Click Create a resource.

- Scroll to Key Vault and click the Create link.

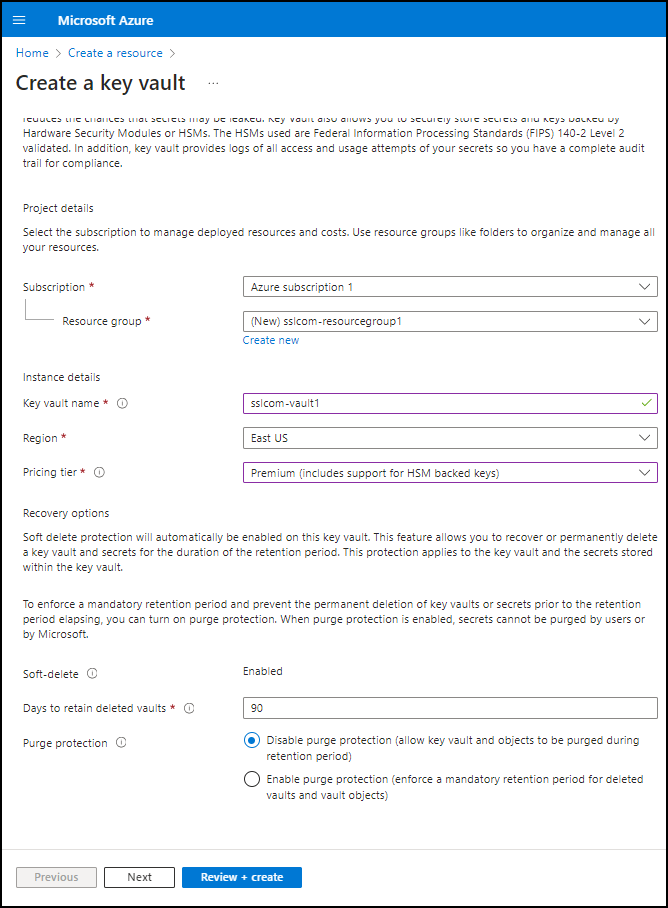
- Under the Basics section, perform the following.
- Select the subscription and resource group. If needed, you can create a new resource group by clicking Create new.
- Assign a name and region. Provide a name for your Key Vault and choose a region.
- Opt for the Premium pricing tier. To comply with the FIPS 140-2 standard, select the “Premium” pricing tier.
- Configure recovery options. Set the recovery options for your Key Vault, including purge protection and the retention period for deleted vaults.
- Click the Next button to proceed to the Access Configuration Settings section.

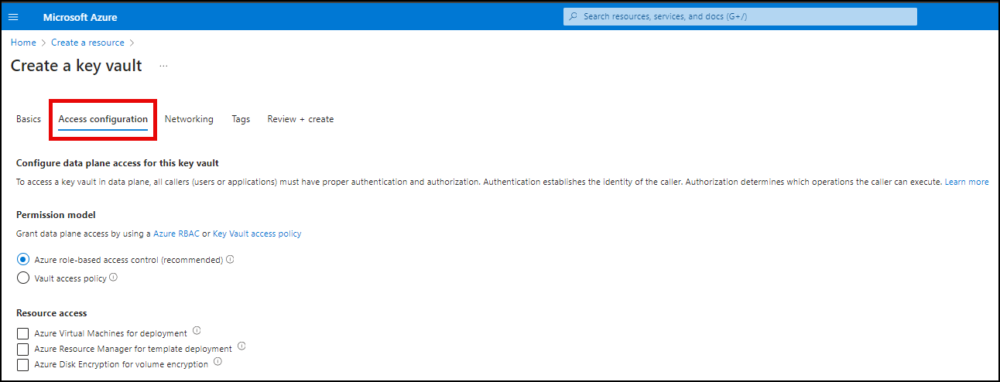
- Click Access configuration. Set the access policies for your Key Vault.

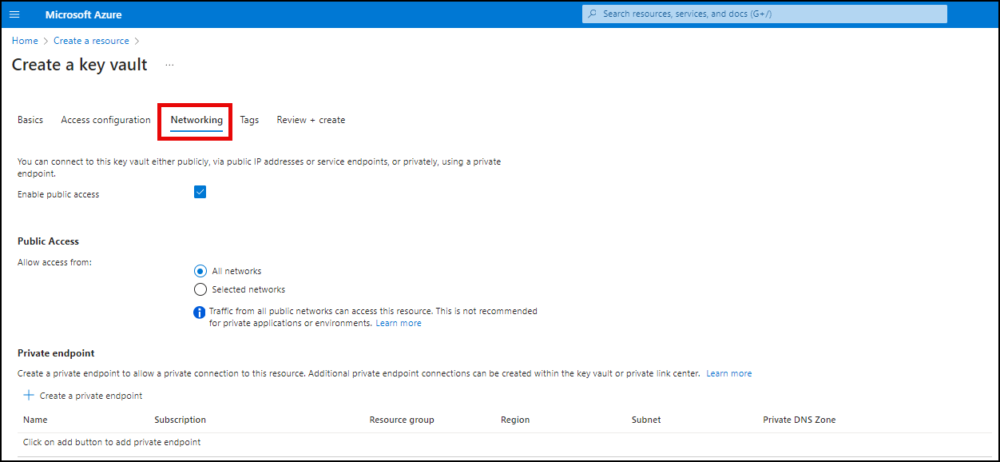
- Click Networking. Choose a connectivity method for your Key Vault.

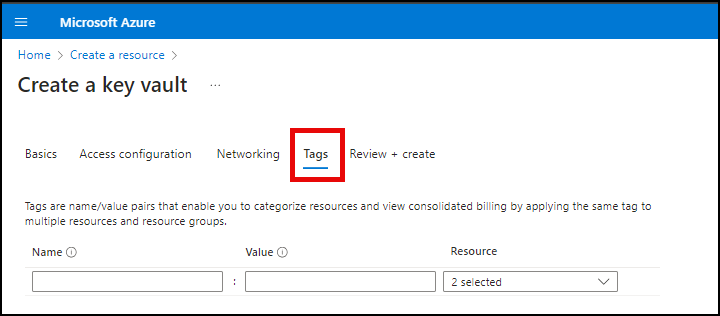
- Click Tags. If desired, create tags for your Key Vault.

- Continue to Review + create. Review your settings, then click the Create button to create your new Key Vault.

- Azure will then create your new Key Vault. Once it is ready, you can access it by clicking the Go to resource button.


Generate a Certificate Signing Request in Azure Key Vault
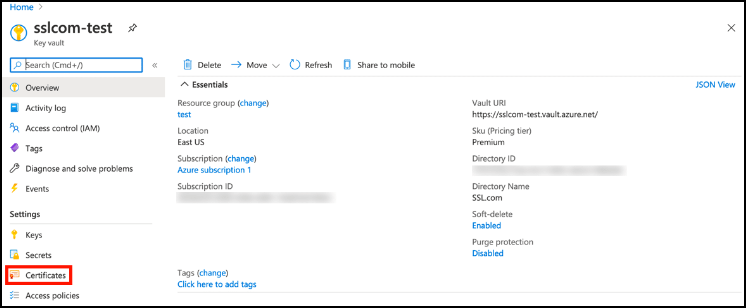
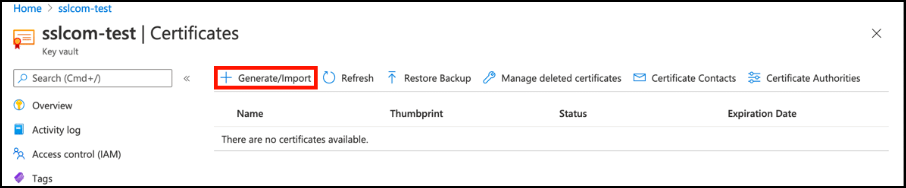
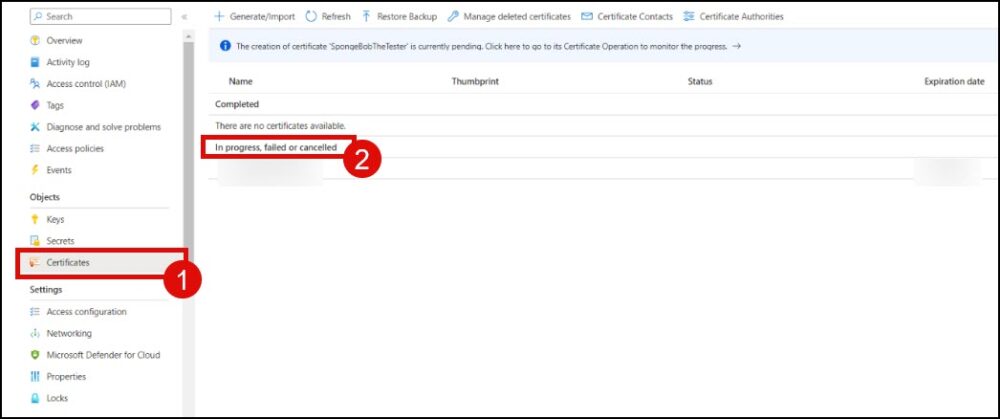
- Select your key vault and click Certificates.

- Click the Generate/Import button to open the Create a certificate window.

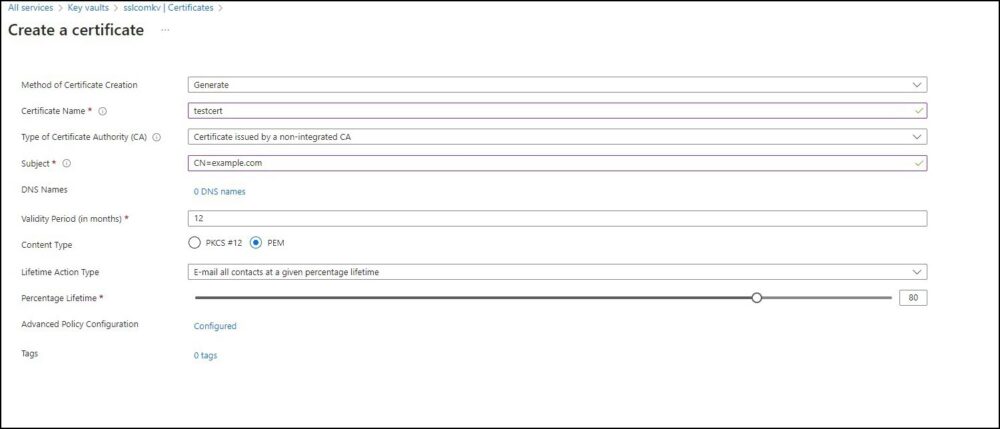
- Accomplish the following fields:
- Method of Certificate Creation: Select “Generate.”
- Certificate Name: Enter a unique name for your certificate.
- Type of Certificate Authority (CA): Choose “Certificate issued by a non-integrated CA.”
- Subject: Provide the X.509 Distinguished Name for your certificate.
- Validity Period: You can leave this set to the default of 12 months. For code signing certificates with longer validity periods, the issued certificate will match your order, not the CSR.
- Content Type: Select “PEM.”
- Lifetime Action Type: Configure Azure to send email alerts based on a certain percentage of the certificate’s lifetime or a specific number of days before expiration.

- Advanced Policy Configuration. Click Advanced Policy Configuration to set the key size, type, and policies for key reuse and exportability.
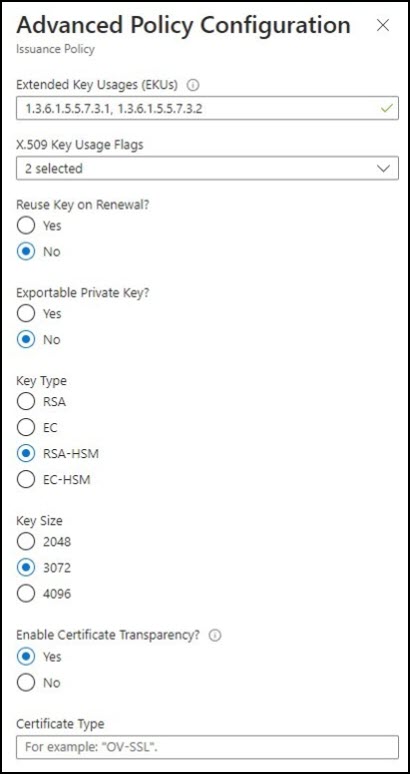
- For certificates issued by SSL.com, you can leave Extended Key Usages (EKUs), X.509 Key Usage Flags, and Enable Certificate Transparency at their default values.
- Reuse Key on Renewal? Select No.
- Exportable Private Key? Select No.
- Key Type. Select RSA+HSM
- Key Size. For a code signing certificate, you can only choose between 3072 or 4096.

- When you are finished setting the Advanced Policy Configuration, click the OK button, followed by Create.

- On the Certificates section, locate your certificate in the list of in progress, failed or canceled certificates and click it.

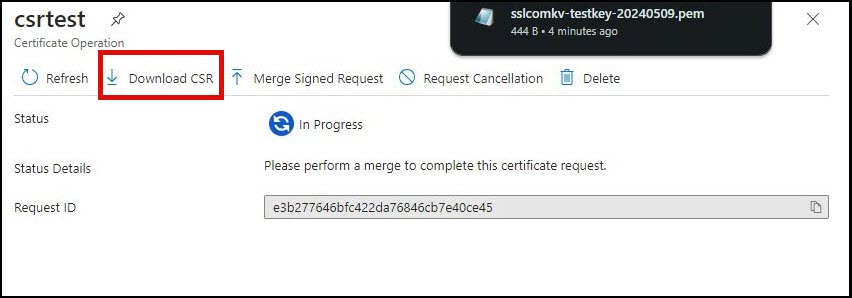
- Click Certificate Operation.

- Click Download CSR and save the file in a secure location.