Time needed: 30 minutes
This tutorial will show you how to purchase a wildcard SSL/TLS certificate from SSL.com. Wildcard certificates allow you to protect multiple subdomains with a single SSL/TLS certificate. For example, a wildcard certificate for *.ssl.com could be used to cover ssl.com, www.ssl.com, secure.ssl.com, and everything-else.ssl.com. (For much more information on wildcard certificates, check out our FAQ, What is a Wildcard SSL Certificate?)
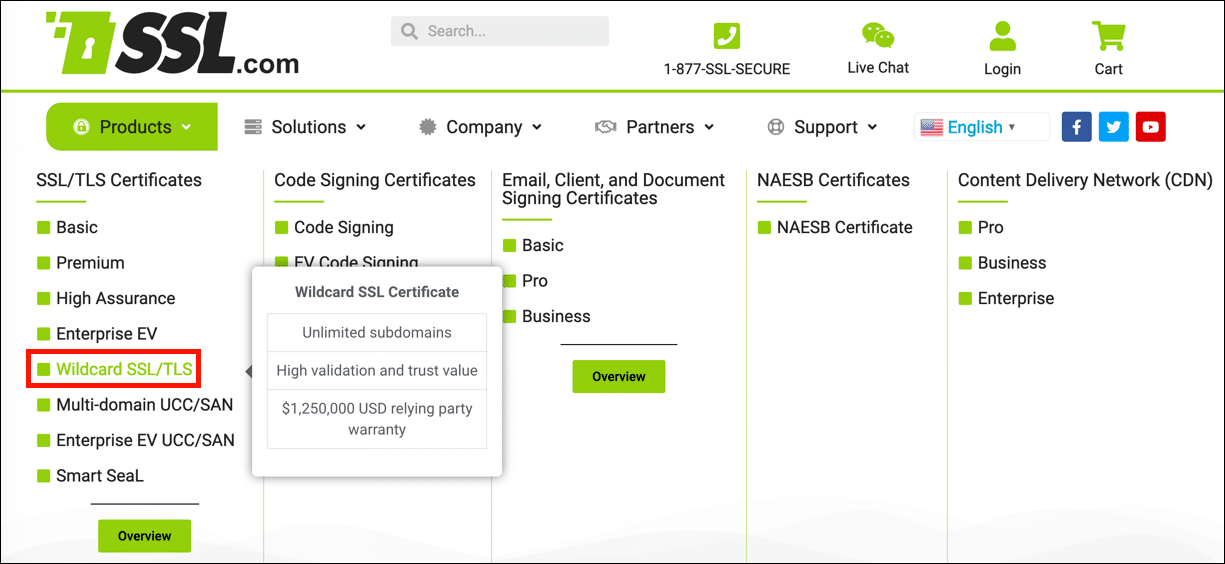
- Go to the Wildcard SSL product page.
Navigate to SSL.com’s Wildcard SSL product page.
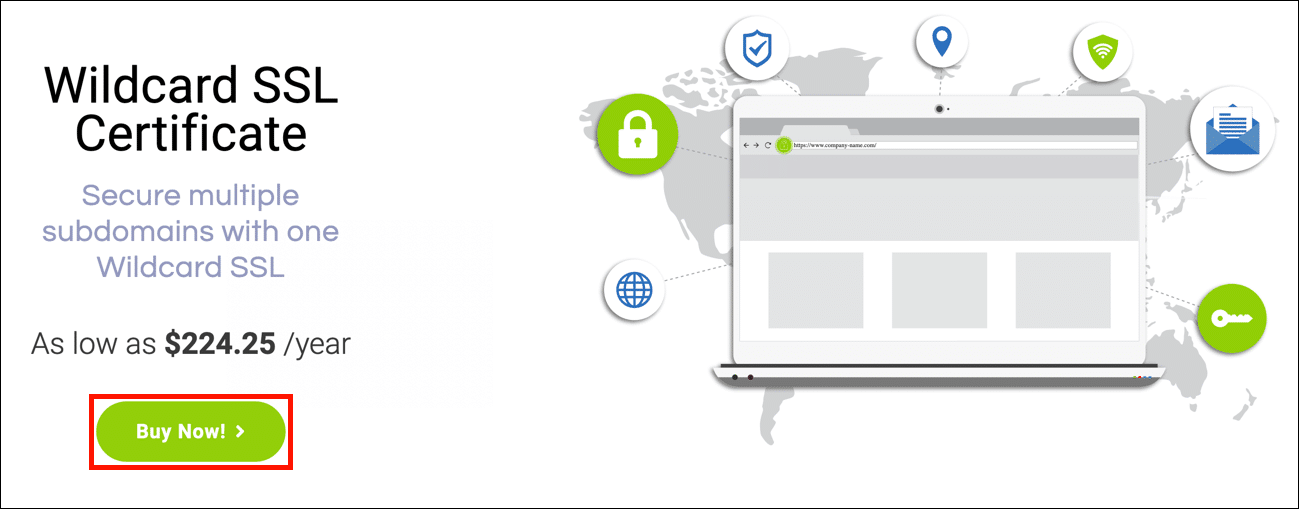
- Click the buy button.
Click the button labeled Buy Now!
- Select duration and add to cart.
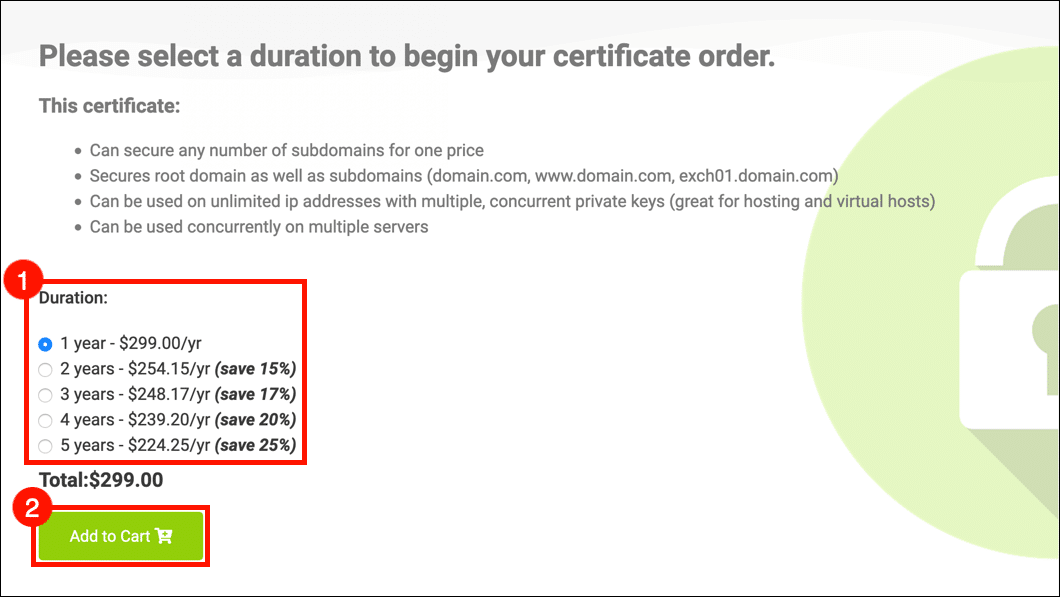
Select a duration for your wildcard certificate order, then click the Add to Cart button. Note that even though the maximum lifespan of any SSL/TLS certificate is 398 days, SSL.com customers can save money by ordering certificate bundles of up to five years. For orders exceeding one year, we issue free replacement certificates upon expiration and re-validation of site ownership throughout the duration of the certificate order.
- Finish shopping and check out.
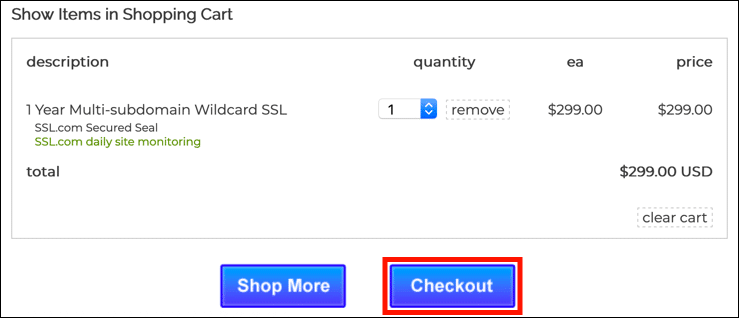
In the shopping cart, you can change the quantity of wildcard SSL certificates, remove them from your cart, or return to shopping with the Shop More button. When your order is complete, click the Checkout button.
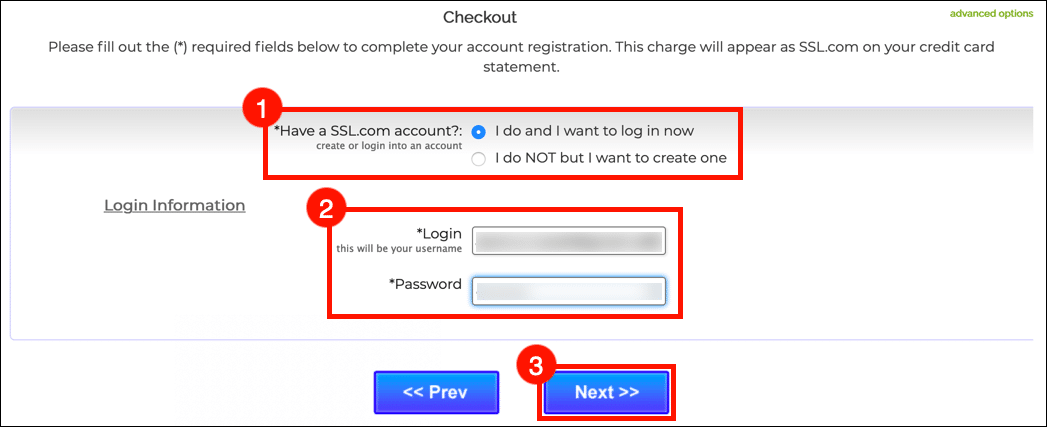
- Log in [if you already have an SSL.com account].
If you are not already logged into your SSL.com account or do not have an account yet, you will be prompted to login or create a new account at the Checkout screen. If you have an account, select I do and I want to log in now, enter your username and password, then click the Next >> button.
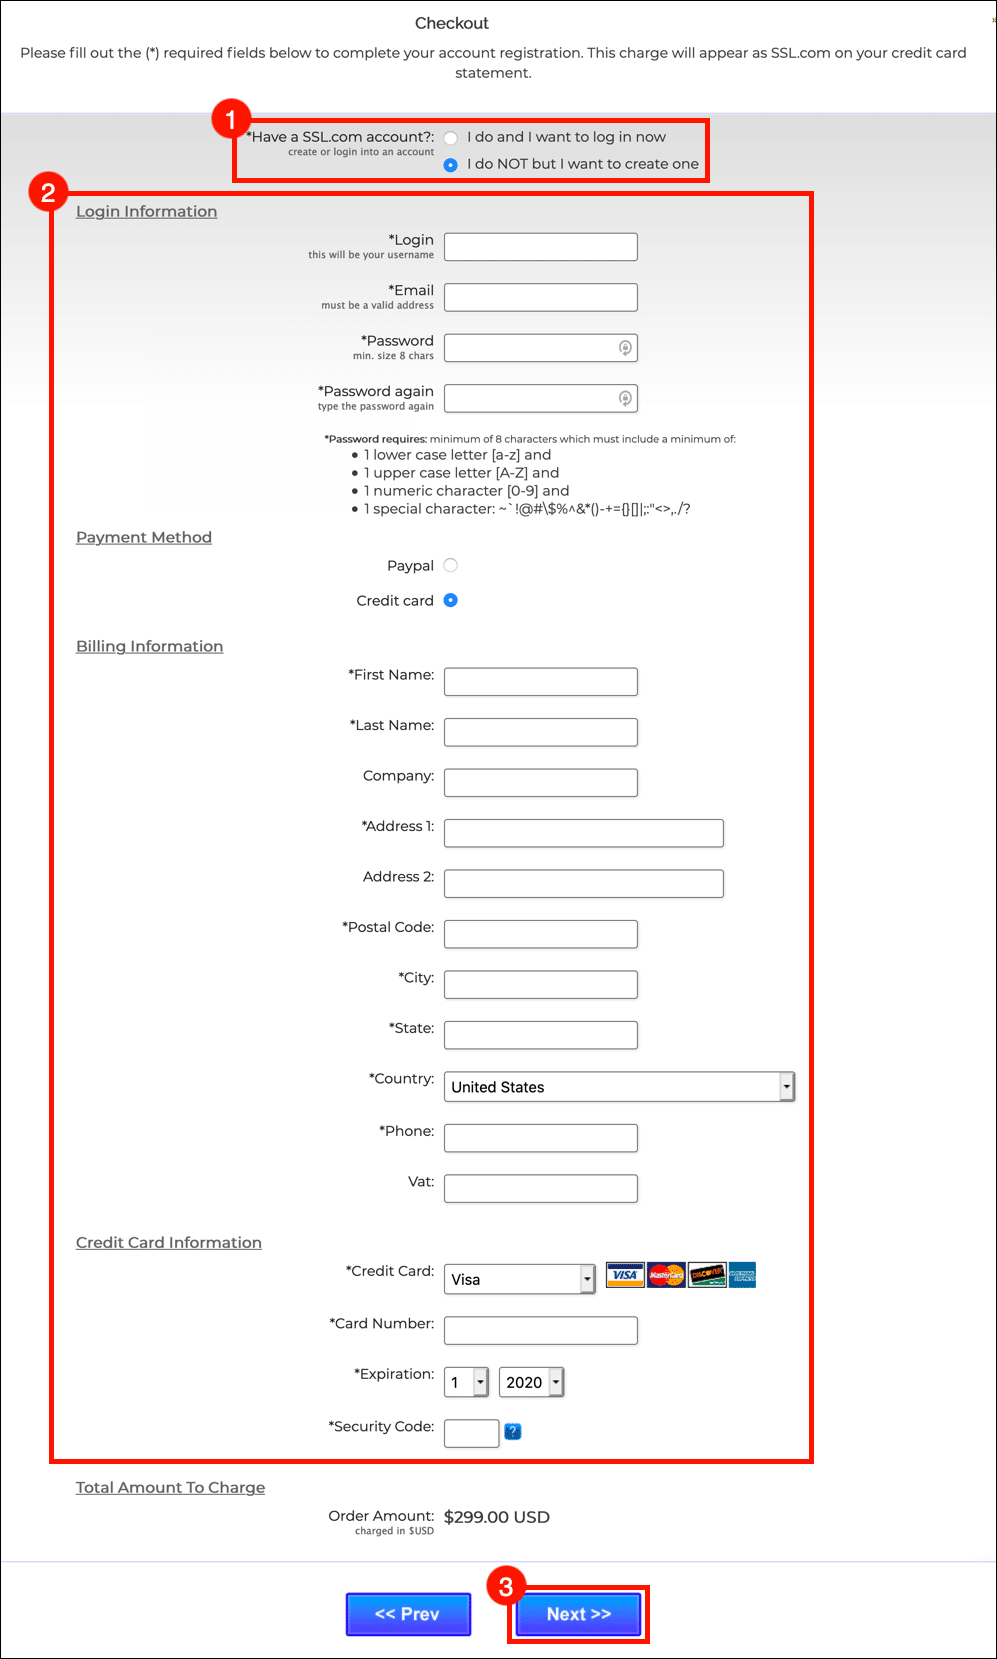
- Create an SSL.com account [if you don’t have one already].
If you do not have an SSL.com account, select I do NOT but I want to create one, fill in the requested information (username, email address, password, and billing information), then click Next >>.
- Apply funds to cover payment.
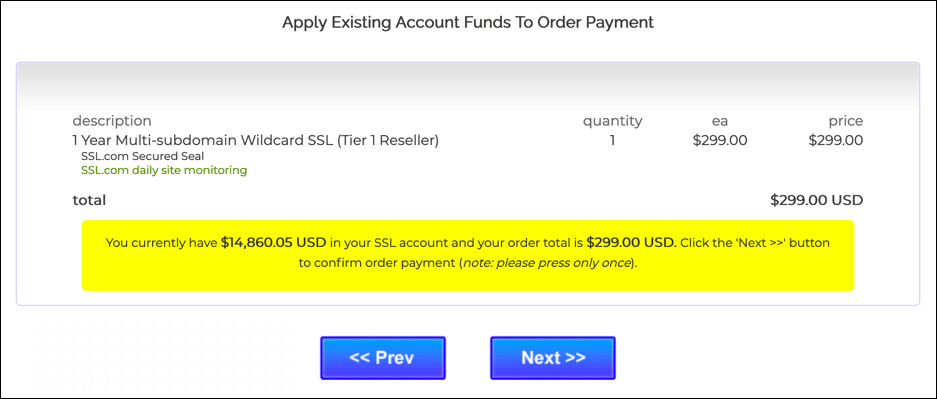
If your account contains existing funds, they will be applied to your purchase. If your account does not contain sufficient funds, you will be prompted to add more. Click the Next >> button when your account has sufficient funds to complete the transaction.
- Click link to finish processing.
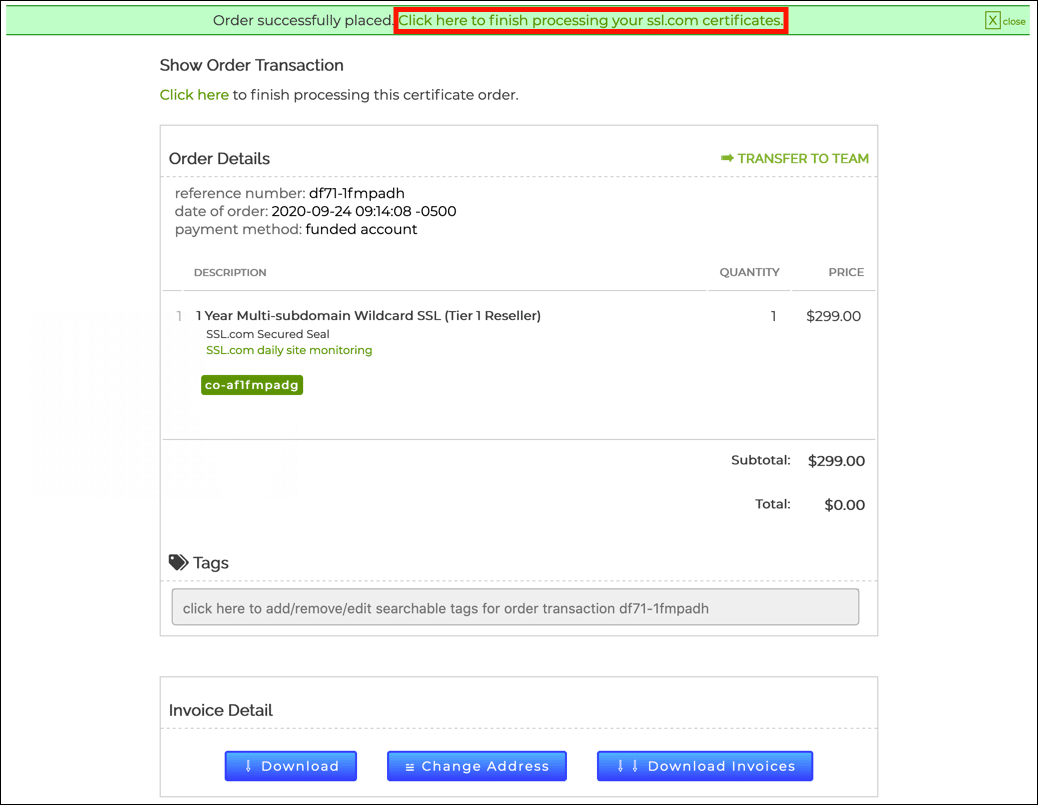
If your order has been successfully placed, you will see a green bar near the top of the browser window, reading “Order successfully placed. Click here to finish processing your ssl.com certificates.” Click the link.
- Click link to submit certificate signing request (CSR).
On the screen that opens, find your certificate order and then click the submit csr link, located in the Action column.
- Submit CSR.
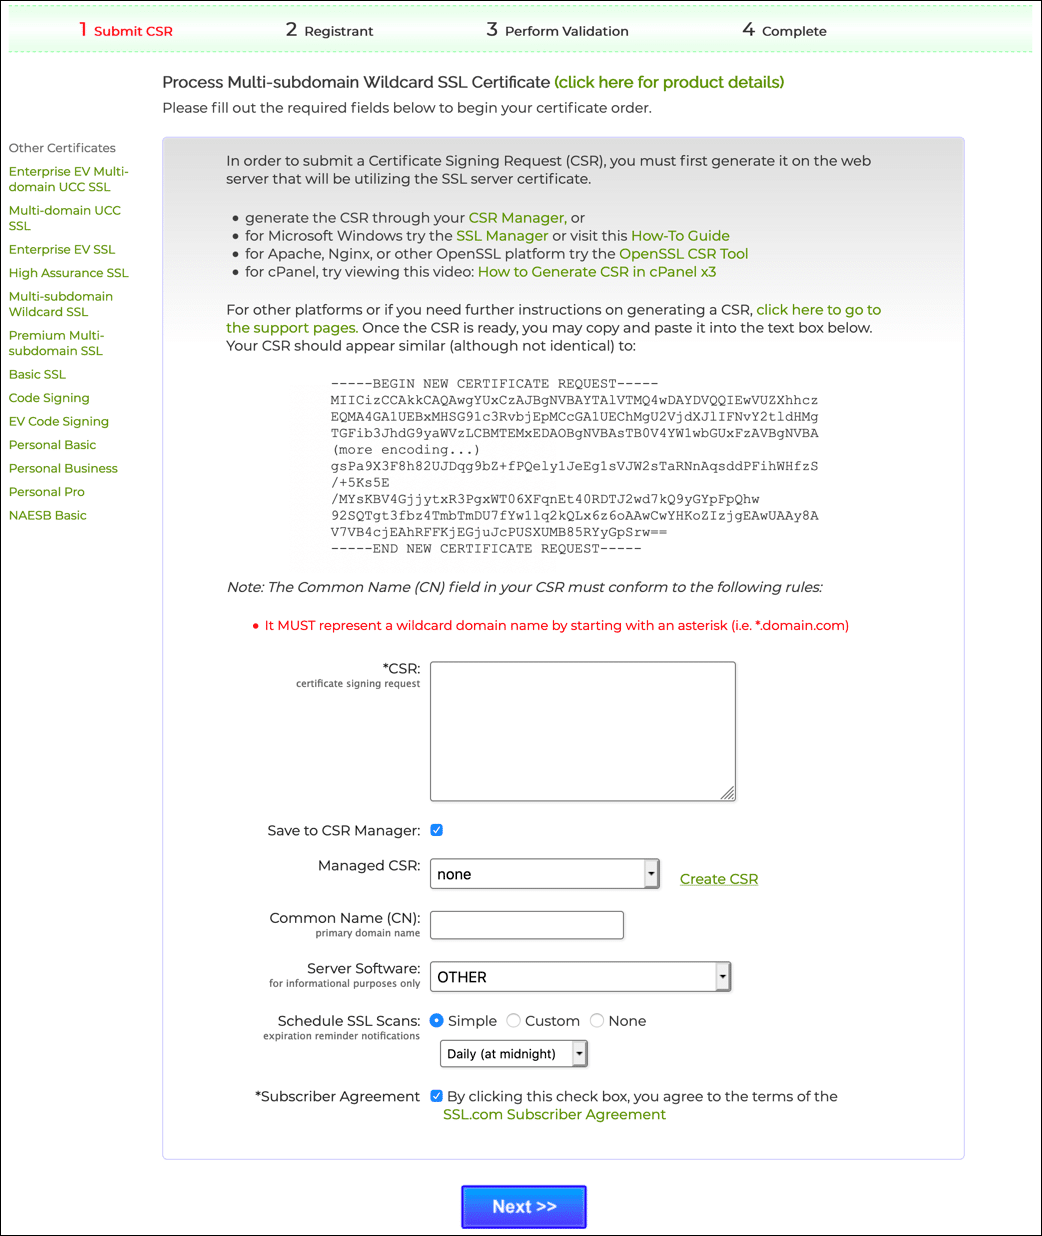
At this point, you will need to submit a Certificate Signing Request (CSR) for the server where the new SSL/TLS certificate will be installed. The CSR may be generated on your server, or in your browser with CSR Manager. A list of links to instructions for CSR generation on various platforms (IIS, cPanel, Plesk, Apache or Nginx with OpenSSL, and others) can be found in this FAQ. For wildcard certificates, the Common Name included in the CSR should include an asterisk in the leftmost position (e.g.
*.example.com).
Fill in the necessary fields, then click the Next >> button when you are ready to submit your CSR. - Enter company details.
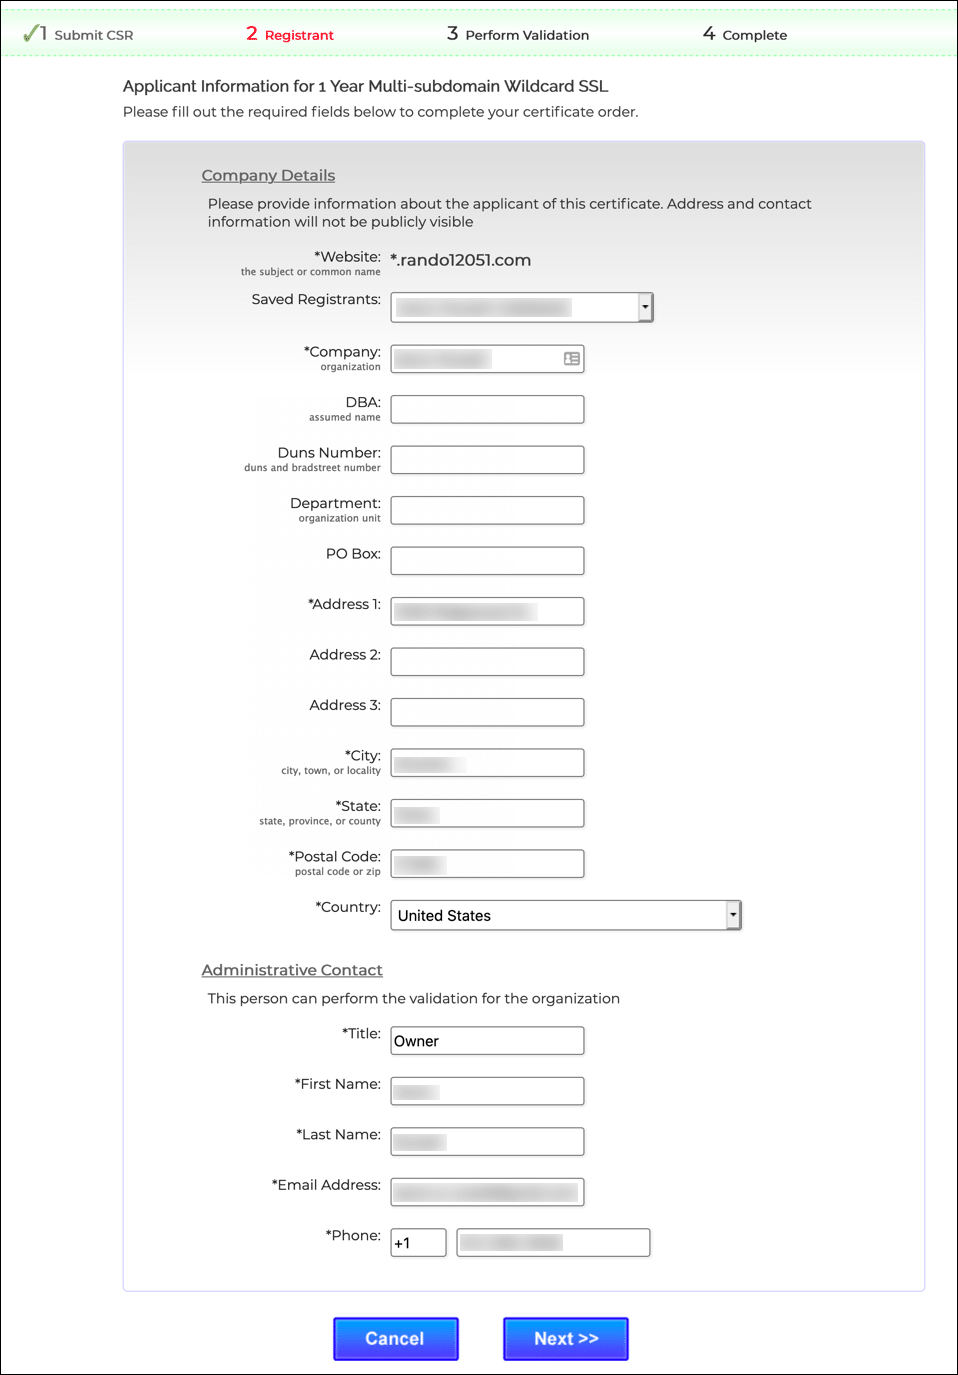
Enter your company’s details, then click the Next >> button.
- Add contact(s) to order.
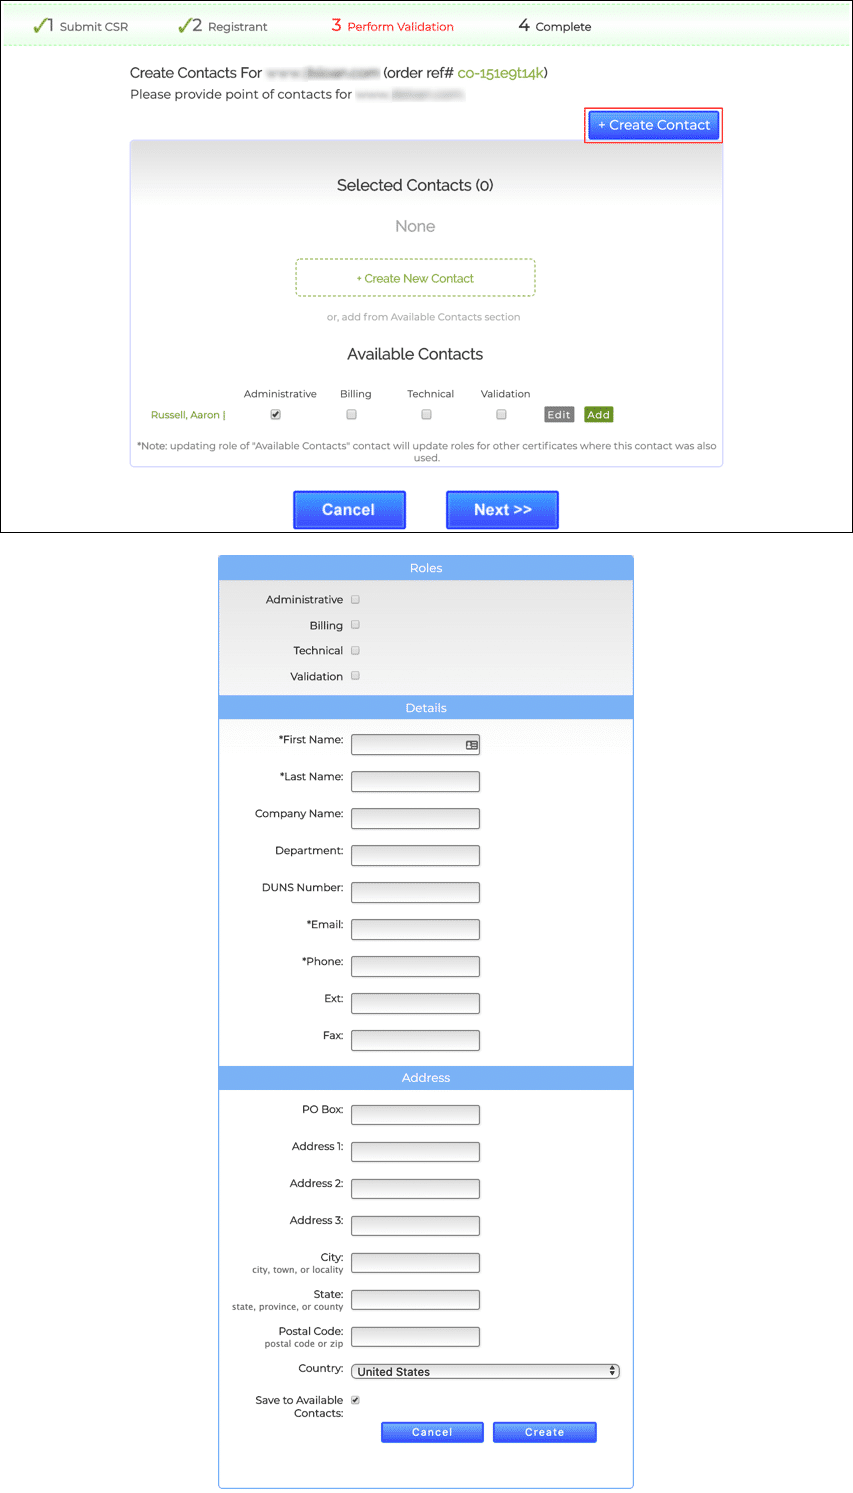
On the next screen, click + Create Contact and then fill in the on-screen form and click Create to add a contact to the order. You must create at least one contact for the certificate, but you can also add more if desired. When you are finished adding contacts, click the Next >> button.
- Select domain validation (DV) method.
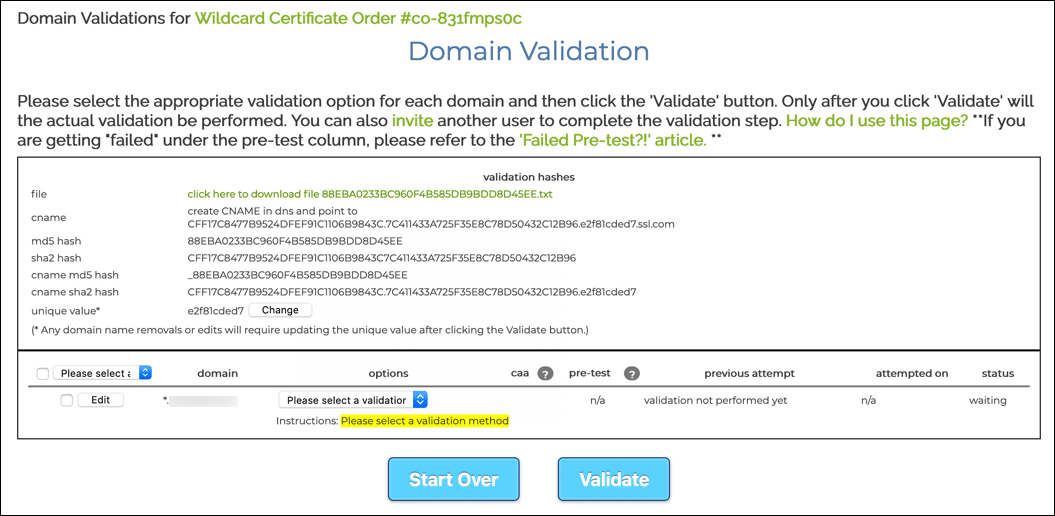
Next, select a method for domain validation. You can validate your control of the domain via email, by adding a CSR hash file to your website, or by creating a DNS record. This tutorial covers only email validation; please see our FAQ, What Are The Requirements for SSL.com SSL/TLS Certificate Domain Validation? for complete details on all available DV methods.
Email validation is simple and straightforward. To validate via email, you will need to have control of one of the authorized email addresses for domain validation:
• webmaster@
• hostmaster@
• postmaster@
• administrator@
• admin@
• Domain contacts (domain name registrant, technical contact, or administrative contact) listed in the base domain’s WHOIS record.
When you have selected a validation method for the domain names the certificate will cover, click Validate, then OK in the confirmation dialog box that pops up. - Email validation: enter validation code.
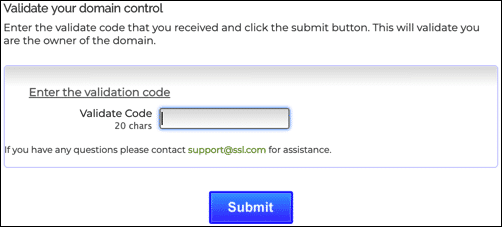
If you chose email validation, you will receive an email message with a 20-character validation code. Copy and paste the code into the input field, then click Submit. If you chose another method, continue with the instructions for that method.
- Domain validated certificate is ready.
Once domain validation is complete, your DV certificate is ready for download. You will also receive an email message with a full certificate chain attached, including your server certificate, SSL.com intermediate certificate, and SSL.com and Certum root certificates. You can also add organization validation (OV) or individual validation (IV) information to your wildcard certificate by following steps 18–23 below.
- Click download link.
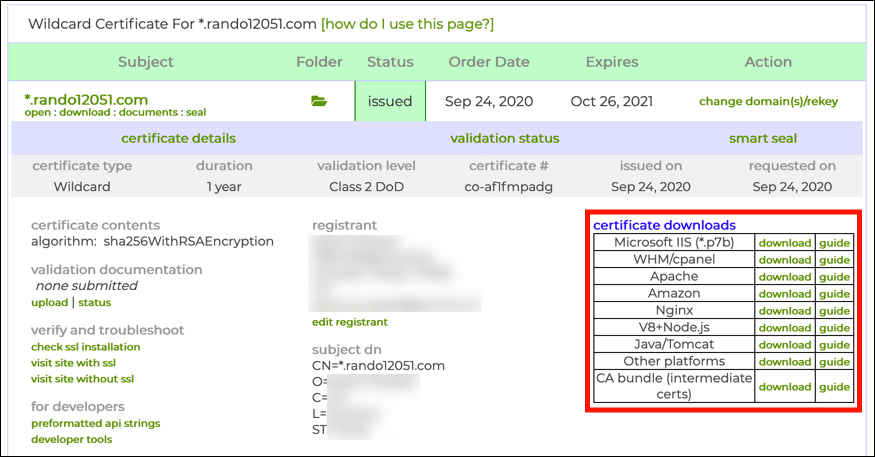
Choose the Orders tab, then click the download link for your order, located in the Action column.
- Download and install certificate.
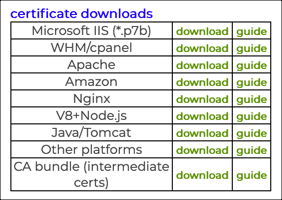
Click the download link specific to your platform to download your certificate files. After downloading, install the certificate following the installation instructions for your server platform.
- Begin OV/IV documentation submission.
Wildcard certificates from SSL.com include the option to add validated information about the organization or individual operating the the website to the certificate. Wildcard certificates including this information are referred to as Organization Validated (OV) or Individual Validated (IV). You may also see certificates of this type referred to as High Assurance certificates.
To add OV/IV information to your certificate, begin by locating your order in the Orders tab of your SSL.com customer account and clicking the documents link. - Click link to upload documents.
Click the Upload Documents link.
- Upload documents.
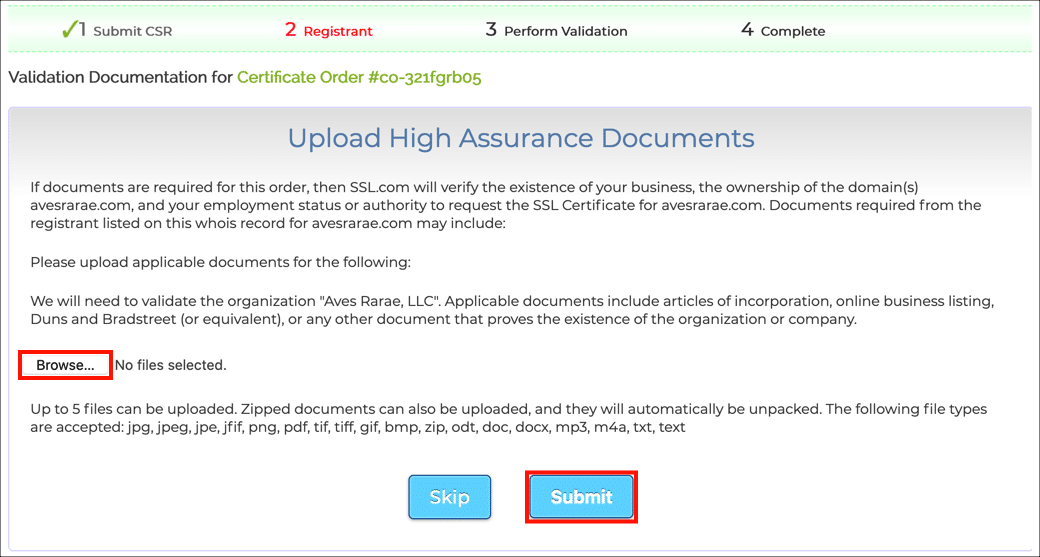
On the next screen you can upload up to five documents providing required information for your certificate order. The required documents differ depending on whether your certificate is to be issued to an individual person or a business or other organization. Please refer to SSL.com’s Requirements for OV and IV Certificates to determine the information you should submit.
Use the Browse button to select files for uploading. When you are finished selecting files, click the Submit button. - Contact SSL.com support.
After submitting your documents, please contact our support staff at Support@SSL.com, or by clicking the chat link on the SSL.com website.
- Initiate callback (businesses and organizations only).
Organization validated (OV) certificates require you to initiate a callback step to validate your business or other organization’s phone number. Please follow the steps shown in Callbacks for OV Certificates to complete OV validation.
- Download certificate.
When all the above steps have been completed and your documentation has been validated by SSL.com, you will receive an email including the certificate, and you will also be able to access it via the download links in your certificate order.


