
This guide provides MacBook users instructions on how to enable an SSL.com S/MIME certificate on the new Outlook for Mac and use it to digitally sign and encrypt their emails. An S/MIME certificate secures email communications by verifying the sender of an email message through the digital signature and preventing unwanted persons from reading the email through encryption.
Note: For S/MIME instructions using Legacy Outlook for Mac, please refer to this SSL.com article: Installing an S/MIME Certificate and Sending Secure Email in Outlook on macOS.
Message can’t be Encrypted None of your recipients have valid encryption certificates. Do you want to send this message without encryption?

To share public keys with someone, just exchange signed, unencrypted emails. After exchanging public keys, you can proceed to send encrypted emails to that person. Refer to the following instructions:
Boost your email security and safeguard sensitive information with SSL.com S/MIME certificates.
Requirements
- A MacBook machine using a minimum of macOS version 10.14 (Mojave).
- New Outlook mode turned on in your Outlook application.
Download and Install your SSL.com S/MIME Certificate
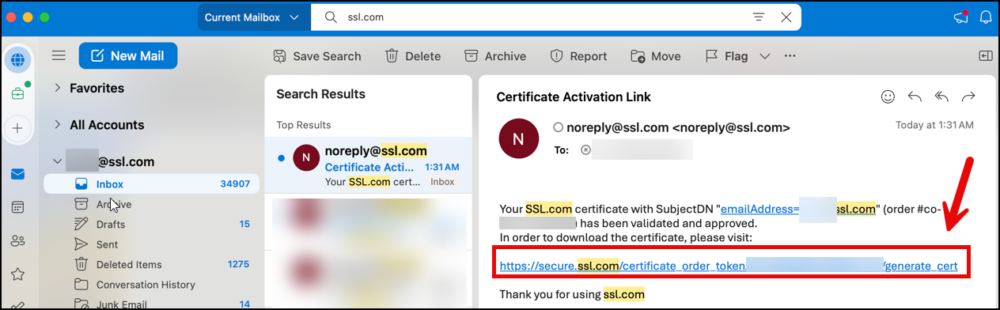
- Login to your SSL.com account. Next, open Outlook and click the link sent by SSL.com to generate your S/MIME certificate.
- The link will take you to a page where you can generate your certificate. When retrieving your certificate, you have the option to select either RSA or ECDSA algorithms from the Algorithm selection menu. Nevertheless, it is advisable to opt for RSA, as ECDSA keys cannot be used for email encryption. Proceed to click the Generate Certificate button.

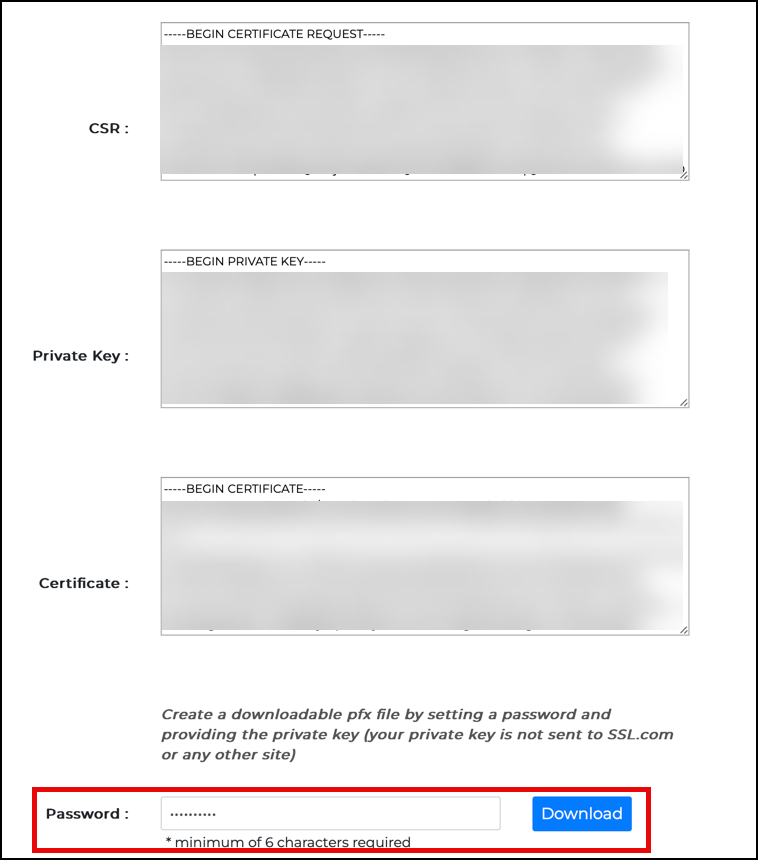
- You will be able to view the text versions of your CSR, private key, and certificate. It’s crucial to safeguard your private key so make sure that no one else obtains a copy of it. SSL.com never accesses or manages your private key (it is generated on your own computer, in your browser).
To save a PFX file with your new certificate and private key onto your computer, first set a password with at least 6 characters, then click the Download button. Make sure to remember this password, as you will need it to install the certificate and key on your computer.
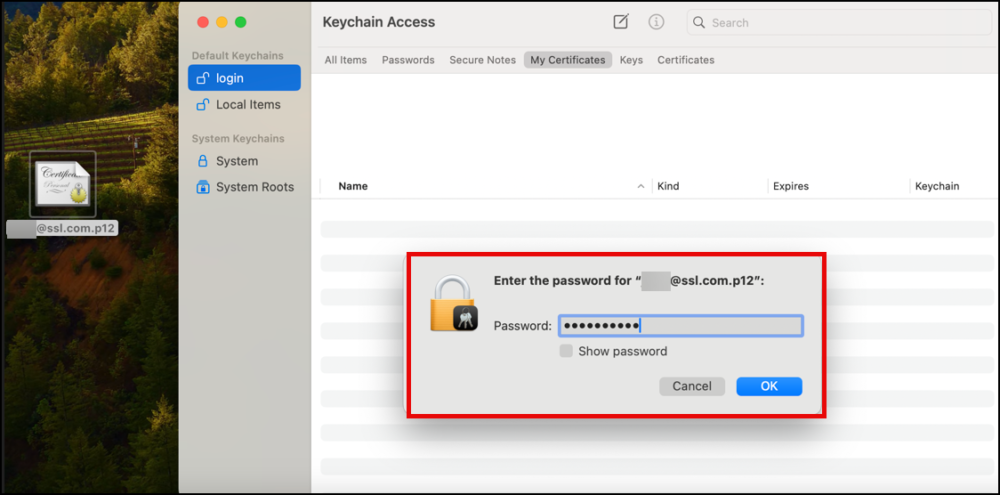
- Open the Downloads folder of Macbook. Hover to your downloaded certificate file. Drag the file to Keychain Access, specifically the login section. Enter the password of your PFX certificate that you created, when prompted for it.
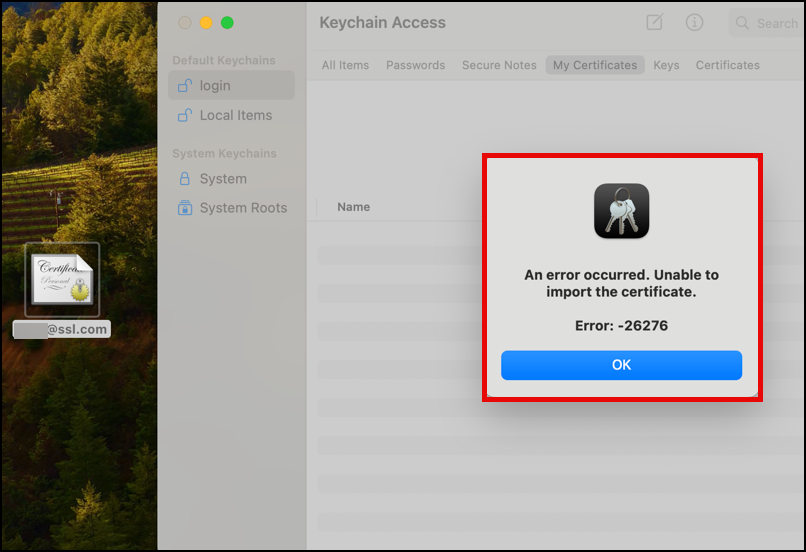
- If you see this error: An error occurred. Unable to import the certificate. Error:-26276, just press the OK button. This message appears to be a common glitch on at least some versions of macOS, and may appear despite the fact that the PFX was successfully imported.
- The certificate is now installed on your MacBook. Keychain Access will show this description: This certificate is valid. A badge and check mark symbol will also be displayed. You are now ready to use your S/MIME certificate on Outlook.

Configure Outlook
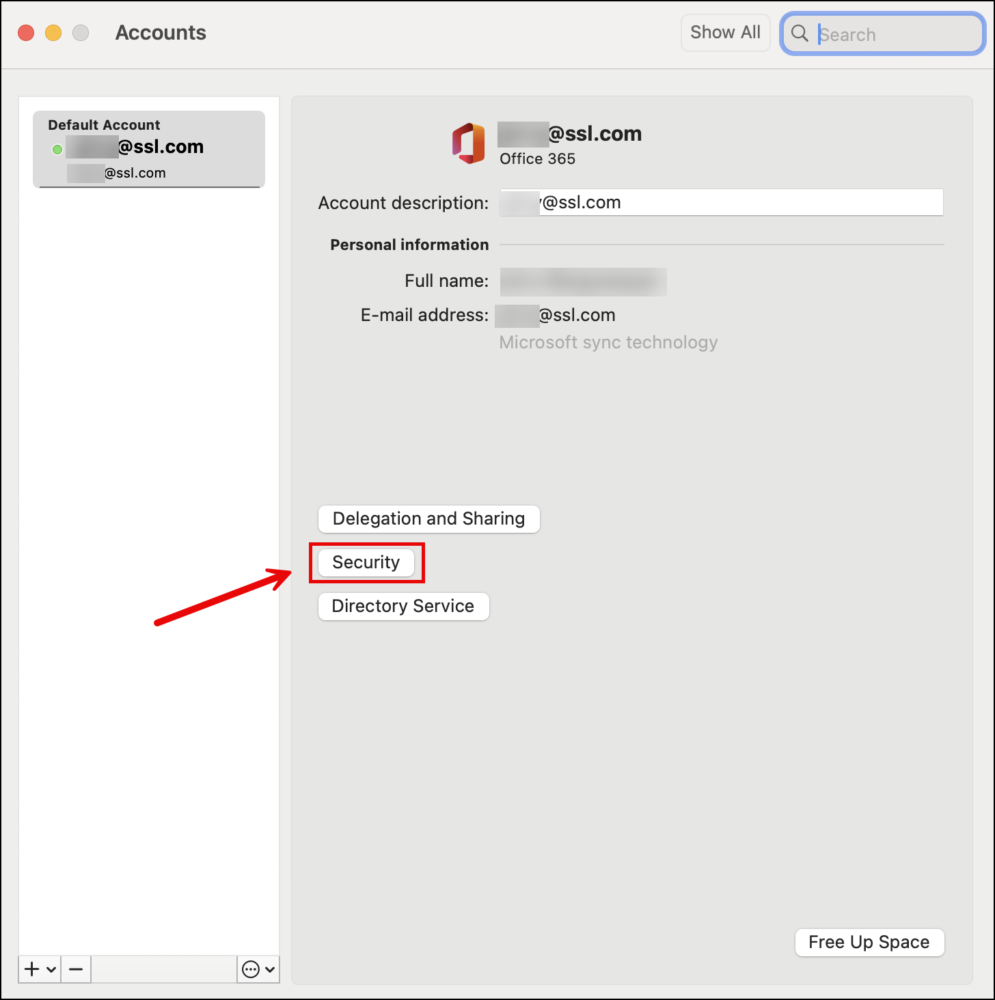
- Hover to Outlook’s top menu and click Tools, followed by Accounts…

- Click the Security button.
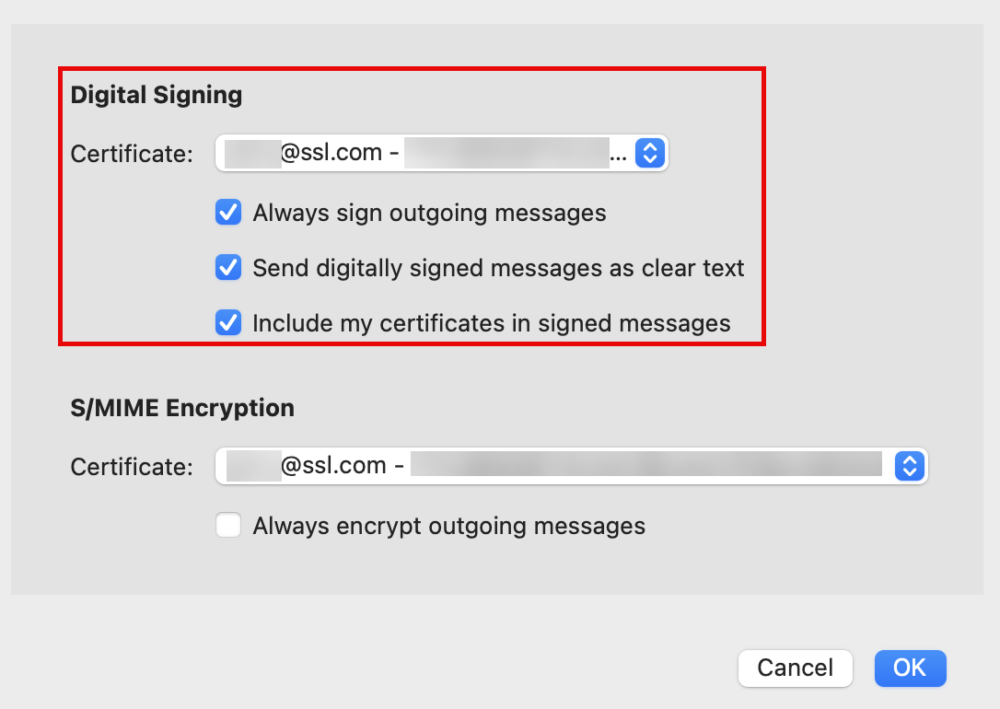
- Under Digital Signing, choose the S/MIME certificate that you imported to Keychain Access. Select also your default preferences for email signing. It is advisable to check all three boxes.
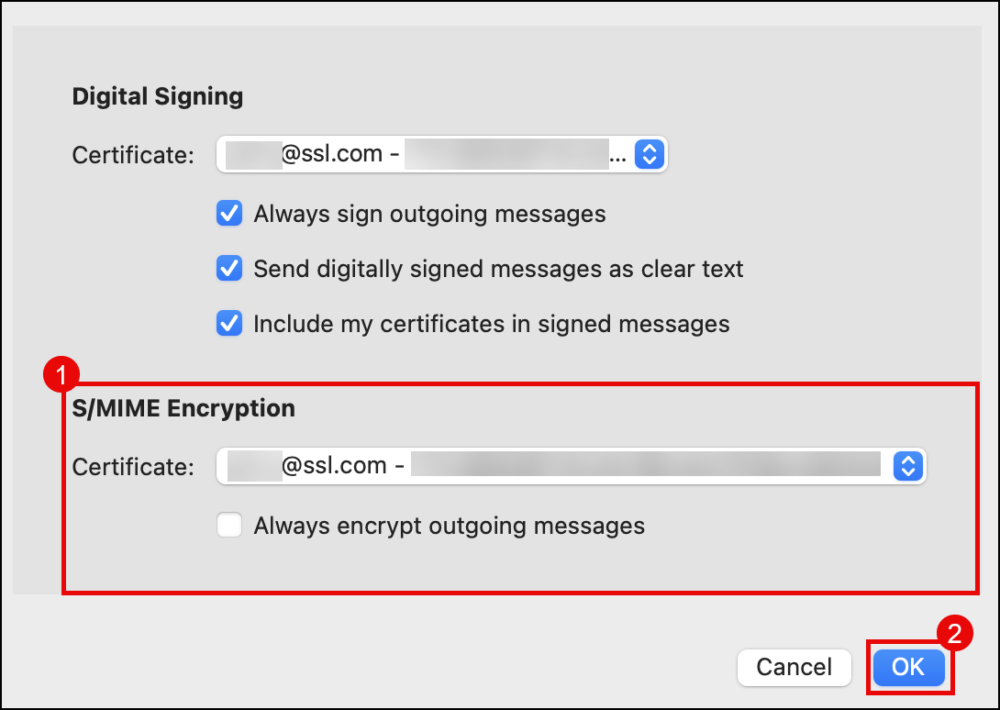
- Under S/MIME Encryption, choose the S/MIME certificate you want to use to encrypt the contents of your email. Since an encrypted message can only be sent to someone if you possess their public key, it’s more practical to leave this unchecked. Click the OK button after configuring your options.
Send an Encrypted Email to Your Contacts
If you attempt to send an encrypted message to someone whom you do not have the public key, Outlook will display this warning dialog:Message can’t be Encrypted None of your recipients have valid encryption certificates. Do you want to send this message without encryption?
To share public keys with someone, just exchange signed, unencrypted emails. After exchanging public keys, you can proceed to send encrypted emails to that person. Refer to the following instructions:
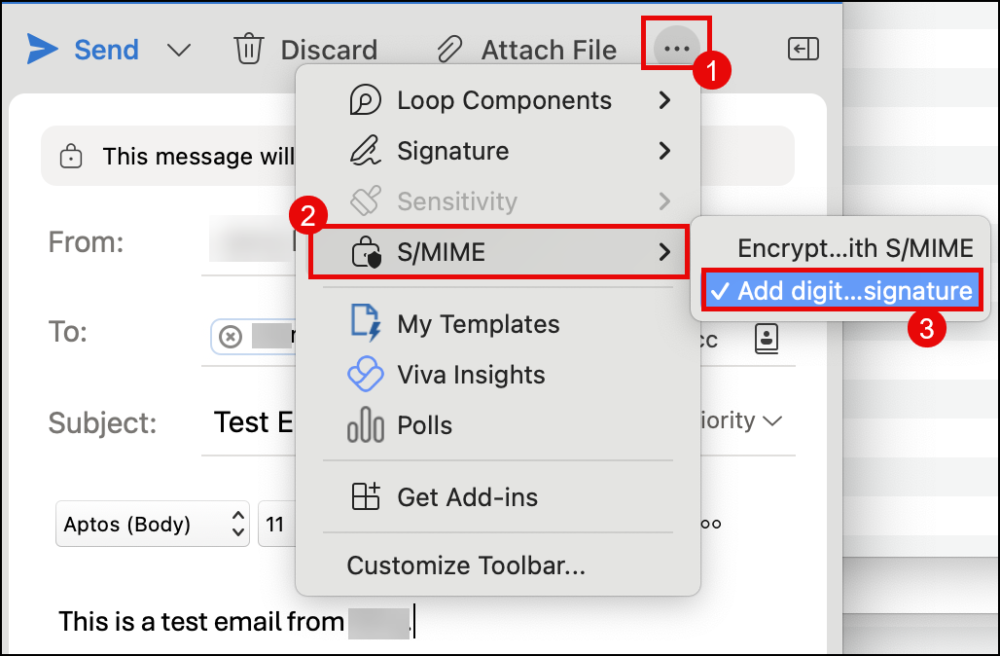
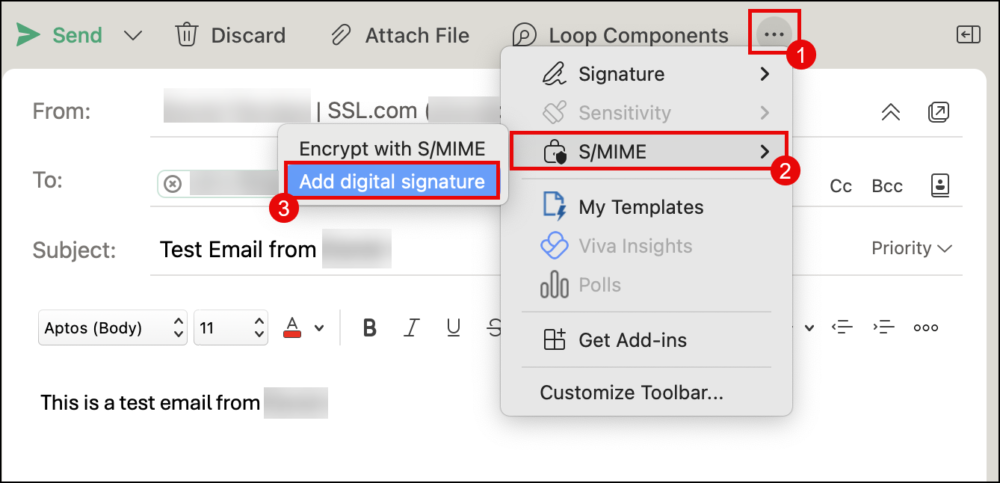
- Create a new email message. Click the ellipsis (three dots) to display the option for S/MIME. Check Add digital signature but do not check Encrypt with S/MIME.
- Your contact should likewise send you a digitally signed but unencrypted email.
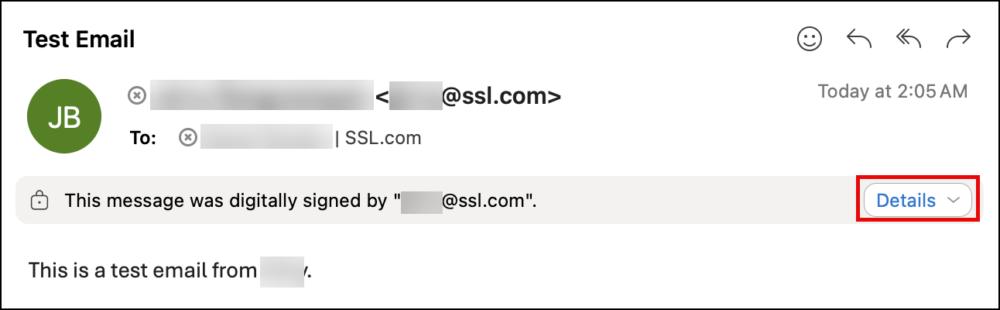
- You and your contact will then proceed to open each other’s digitally-signed emails. Click the Details button.
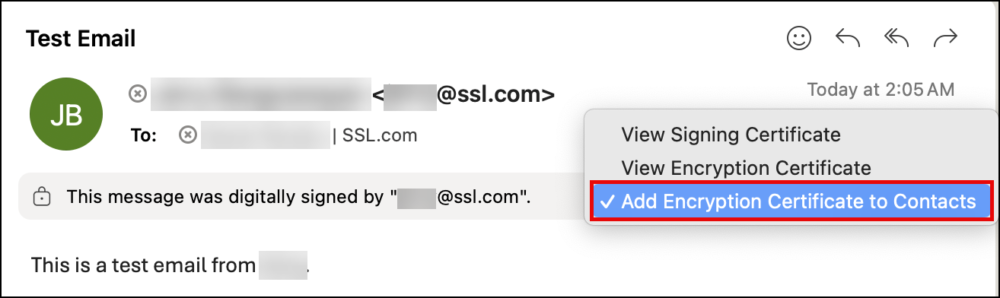
- Select the option: Add Encryption Certificate to Contacts. You will now have each other’s public key and from here, you will be able to exchange encrypted emails.
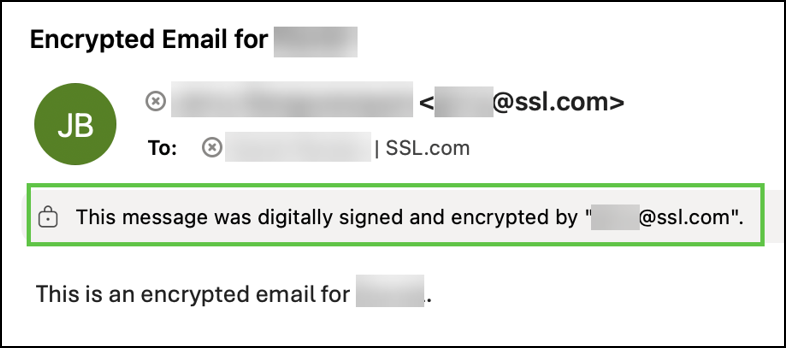
- Create a new email. On the S/MIME option, you can now select both Encrypt with S/MIME and Add digital signature.

- When your contact opens the email you sent, Outlook will confirm that it was you who signed and encrypted it. Only those contacts who have your public key will be able to read the contents of your encrypted email, thus ensuring the security of your communications.
Thank you for choosing SSL.com! If you have any questions, please contact us by email at Support@SSL.com, call 1-877-SSL-SECURE, or just click the chat link at the bottom right of this page.