This guide explains how to create and manage a document signing workflow in eSigner, including how to add signers and configure the signing process for a PDF file.
eSigner is a browser-based application that enables individuals and organizations to collect annotation-based electronic signatures from one or more persons.
A workflow manager can upload a PDF, place signature fields, and invite people to sign via email. Each signer can add their electronic signature directly to the document without needing to navigate a complex signing software. eSigner therefore provides a convenient platform to manage multi-party signing of pertinent documents including contracts, agreements, invoices, and statements of work.
Requirements
- The workflow manager should have an active eSigner account. Using tools and functionalities in the eSigner app, the workflow manager configures the signing process and coordinates the participating signers. For a smoother signing experience, the workflow manager should encourage all signers to create eSigner accounts before sending the email invitations. Refer to this guide to setup an eSigner account: Getting Started with your eSigner Account
Getting Started
Create an Account
- Go to esigner.com and click any of the Start free buttons.
- Fill in all the required fields to create your SSL.com Account. These fields include username, First Name, Last Name, email address, and password. Take note of the requirements for an acceptable password. Once finalized, click the CREATE ACCOUNT button to proceed.
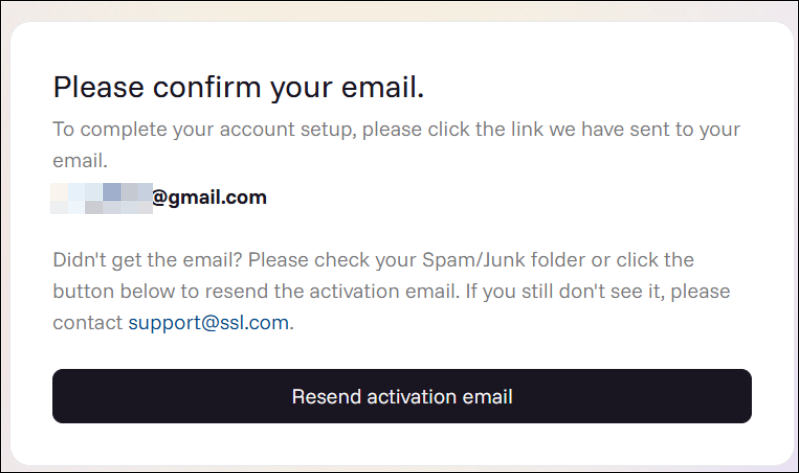
- Check the activation link sent to your email address. If you don’t see it, try another secure browser, or check your spam folder. If the activation link is still missing, click the Resend activation email button.
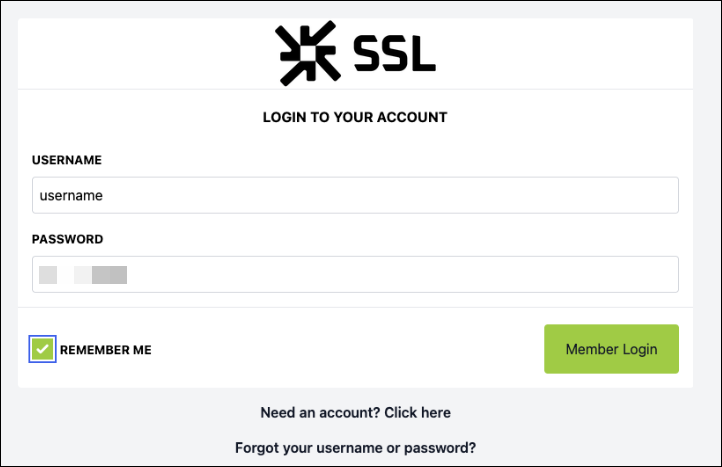
- A new login session will appear. Place your username and password. Check the box for REMEMBER ME for easier logins in the future. Afterward, click the Member Login button to log into your account.
Create your eSigner Signature
Once you have an active eSigner account, the next task is to create a signature. This allows you to set an annotation which includes a First and Last name and a chosen signature style (typewritten, handwritten, or image-based).
Multiple options for your signature can be created and saved in your account. When signing a document later on, this allows you to choose which signature style you prefer to use.
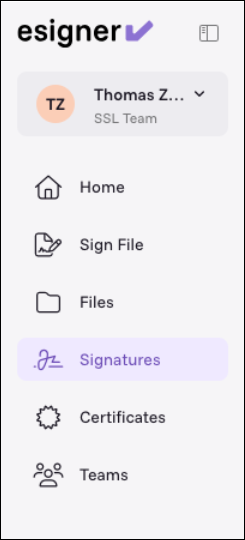
- Click Signatures on the menu.

- Click New Signature.

- Select your choice for signature style.
- Type
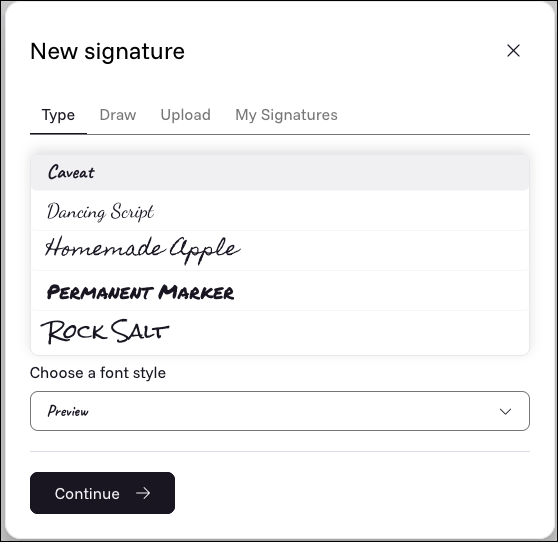
The Type option provides preset and typewritten signature templates bearing the First and Last name of the person. Pick the font style that you want and click Continue to confirm your choice.
- Draw
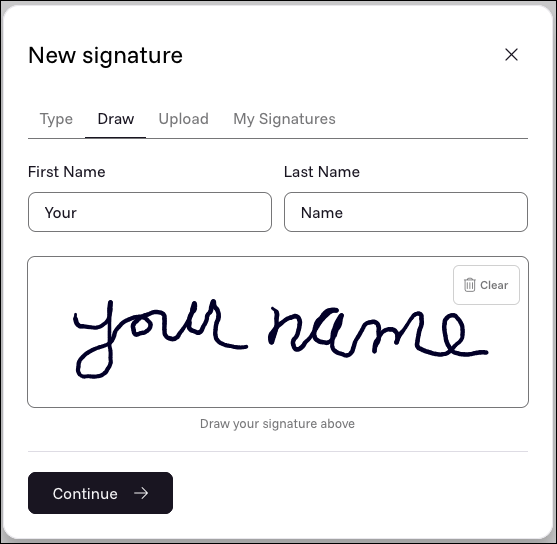
The Draw option enables you to use your mouse to generate your customized signature. This option is good for users who wish to replicate their handwritten signatures on the eSigner app. Should you wish to replace the drawn signature, simply click the Clear button to start over.
- Upload
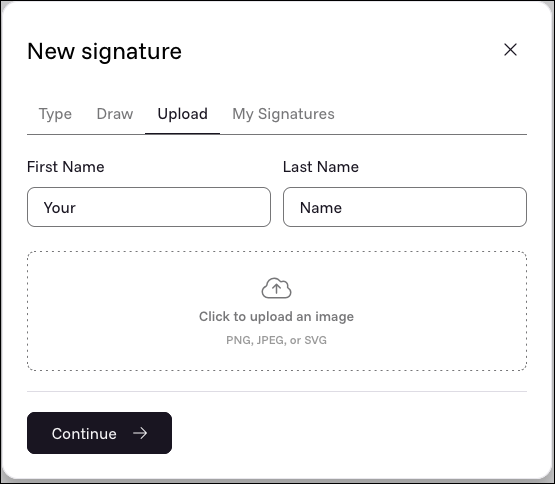
The Upload option allows a user to use an image as their annotation. Click anywhere inside the image upload box to select and upload the image you want and then click the Continue button. Compatible image file types include PNG, JPEG, and SVG.
- Type
- All signing profiles you created will be saved in the My Signatures section. When signing a document later on, you will have the choice to use which signature style you want to apply.
Create a Folder
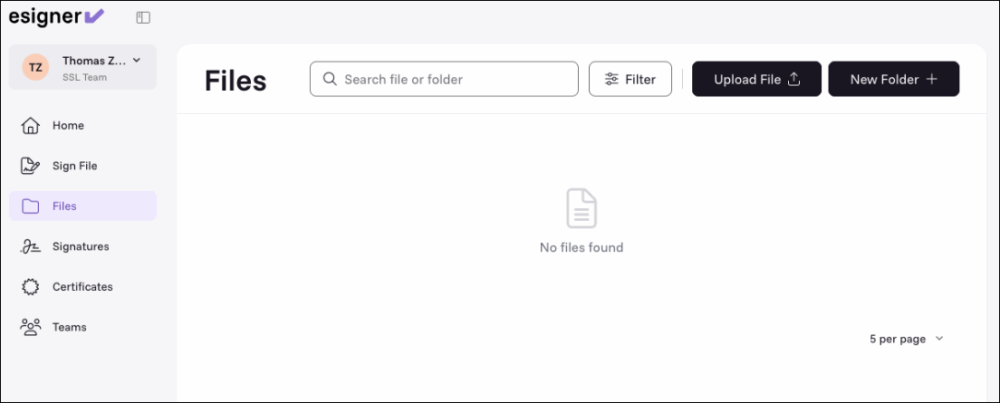
If multiple documents will be signed regularly using your eSigner account, it is advisable to use the folder tool to better organize your files. You can also create folders within folders for a more nuanced structure.
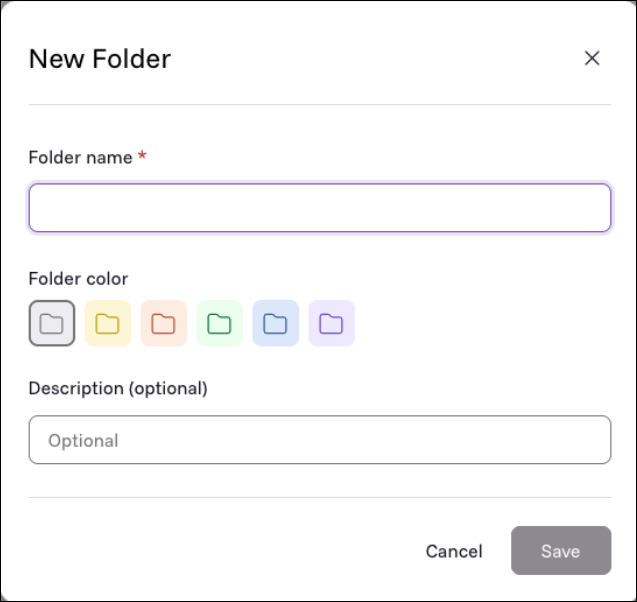
- Click Files on the menu followed by New Folder.
- Set a name for the folder and click the Save button.
Create a Signing Workflow and Invite Multiple Signers to a Document
How to set up the workflow
- Go to https://app.esigner.com/ and login to your eSigner account.
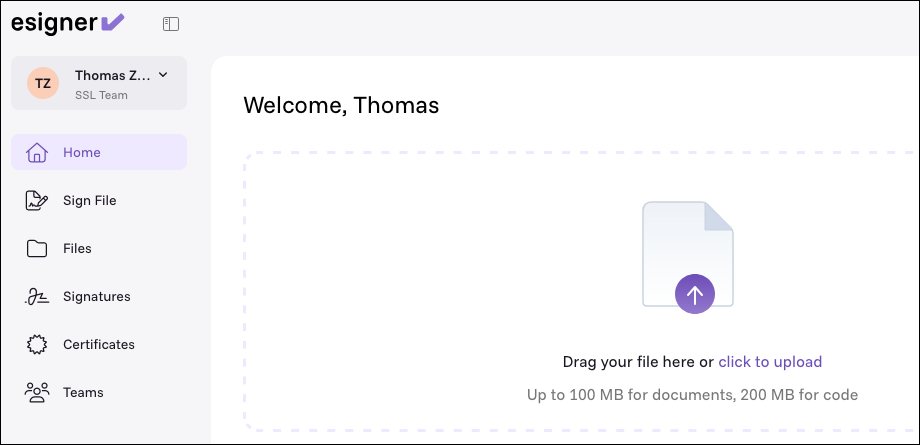
- Click Home from the menu and click the upload box to import your file for signing.
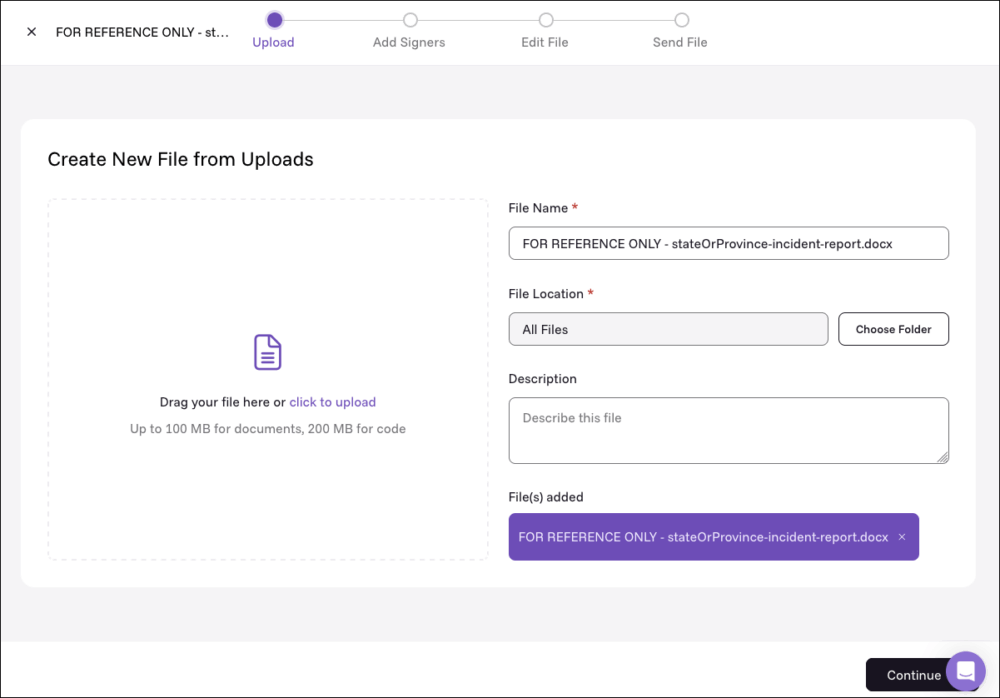
- Set a name for the signable file. Choose which folder the file will be saved. You can also add a file description to help you easily identify the context of the file when searching through your folders. Once everything is finalized, click the Continue button.
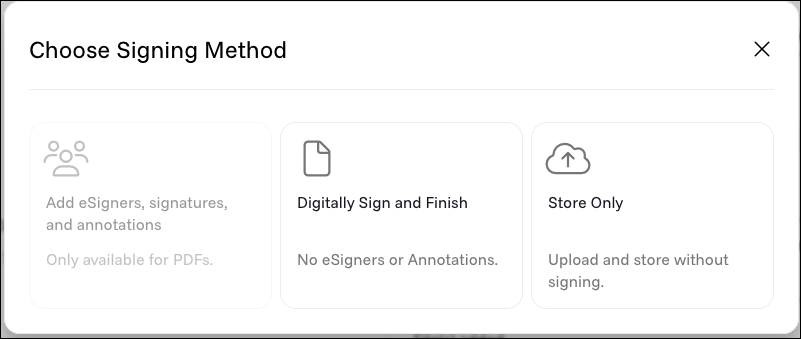
- When prompted to choose your signing method, select Add eSigners, signatures, and annotations
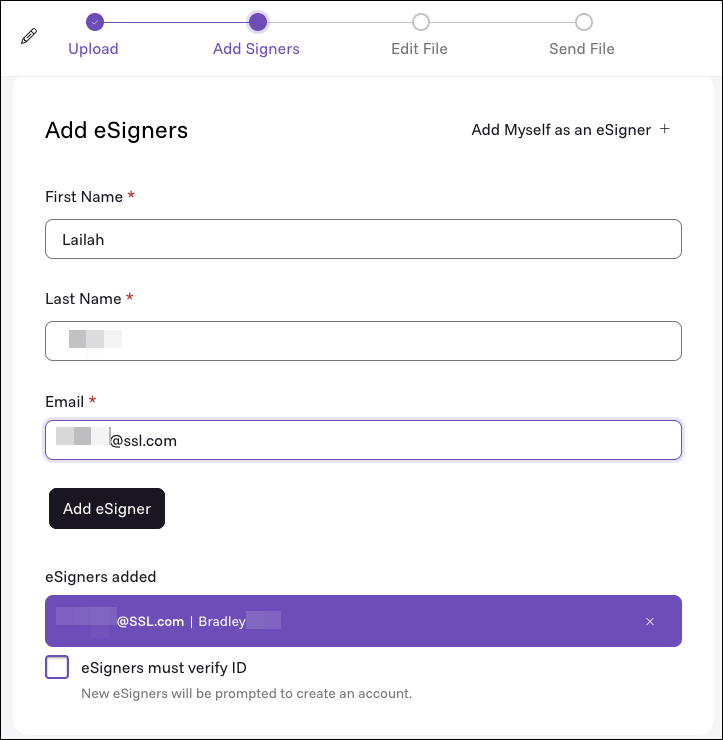
- Set the First Name, Last Name, and email address of each signer. Afterward, click the Add eSigner button to confirm the addition of each signer.
If you are one of the signers of the document, click this option to auto-populate the required fields: Add Myself as an eSigner
You can also require signers with no eSigner accounts to create their accounts first before being able to sign by checking this box: eSigners must verify ID
Once finalized, click the Continue button to proceed.
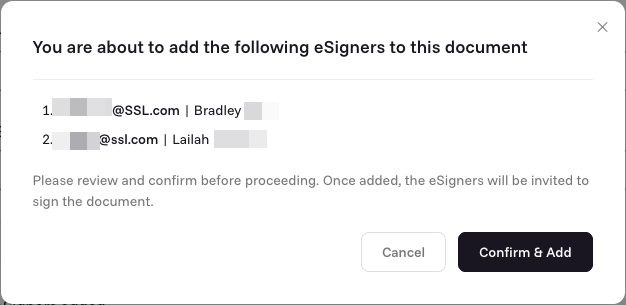
- You will be prompted to review the list of signers to the document. Upon confirmation, click the Confirm & Add button.
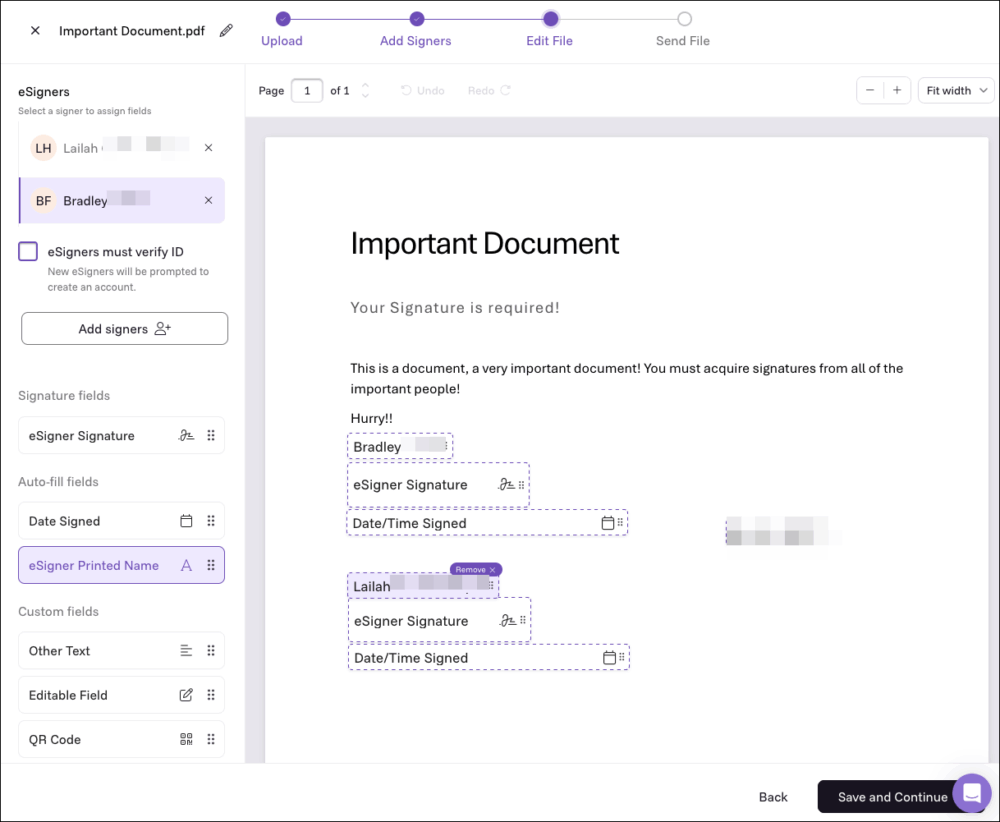
- On the eSigners section, the list of all signers will be displayed. To set up the fields for each signer, click the name of the signer on the list.
Next, under Signature fields section, click and hold the eSigner Signature button and then drag the signature placeholder to the desired position in the document preview pane.
The workflow manager can also choose to include optional fields including auto-fill fields like the name of the signer and the date of signing. An auto-fill field like the name of the signer is a good option to display if the signer chooses a handwritten or an image-type signature which may not intuitively show the name of the person.
Once all the fields have been set for all signers, click the Save and Continue button to proceed.
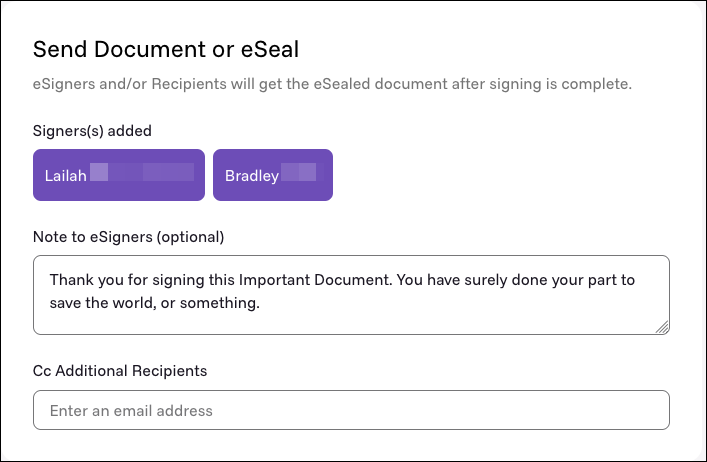
- You will be prompted to review the names of signers. You can also add a note to each signer by using the message box. Upon review, click the Finish button.
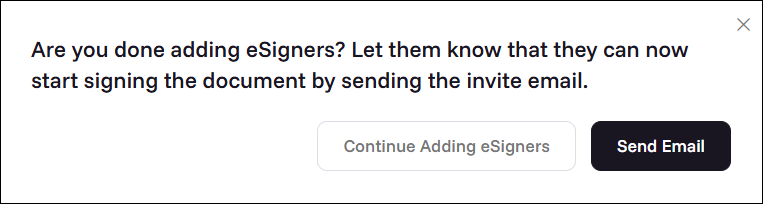
- A prompt will appear asking if you are done adding eSigners or you would like to add more. When done, click the Send Email button so each signer can apply their signature to the document.
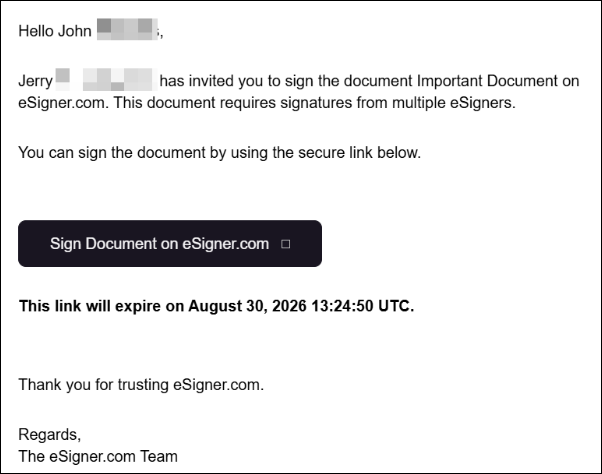
- The signing link will be sent to all persons invited. If the email does not appear in their primary inbox, they should try accessing their email on another secure web browser, or check the Spam folder.
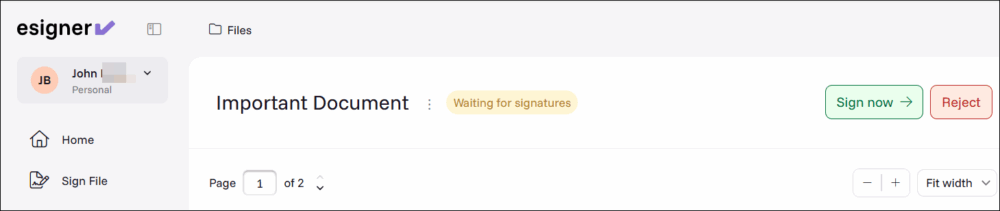
- Opening the link will take them to the eSigner app where they can apply their signature by clicking Sign now.
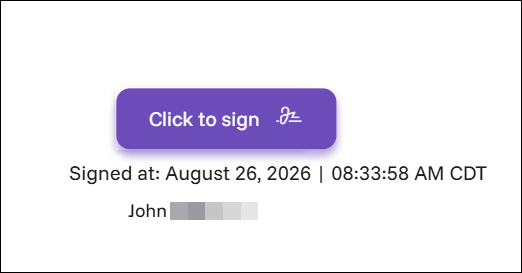
- eSigner app will proceed to show the document preview. The signer should locate the signature placeholder bearing his name. Afterward, select the Click to sign button.
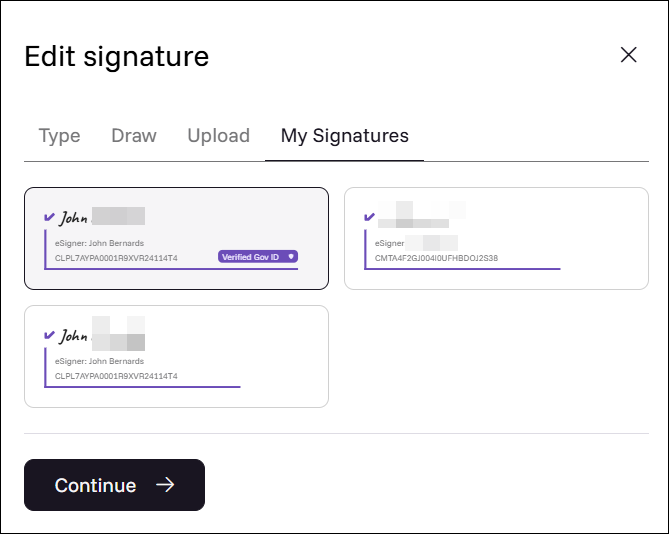
- A prompt will appear allowing the signer to select which signature style will be used. Clicking the My Signatures will display all saved signature profiles. Click Continue to proceed.
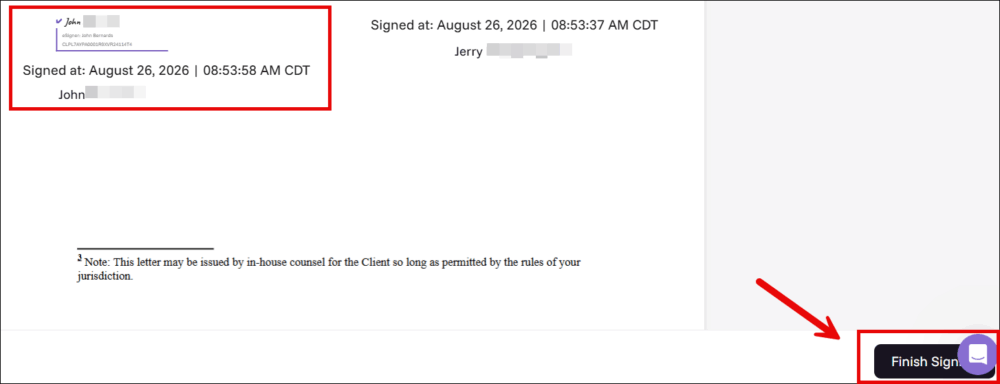
- The chosen signature will appear in the designated placeholder. The signer should click the Finish Signing button to continue.
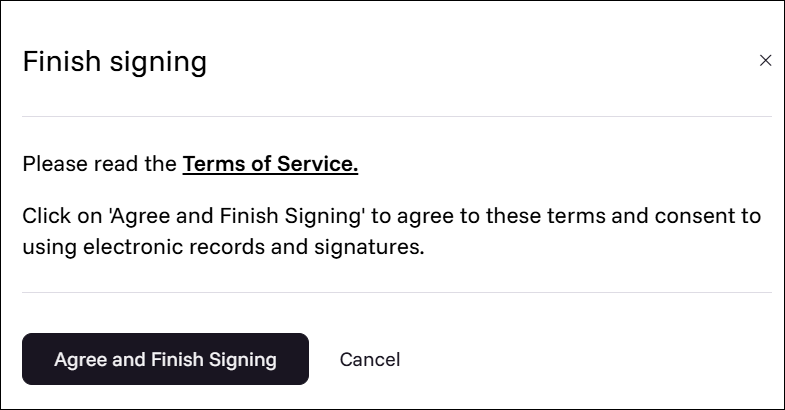
- The signer will be prompted to agree to the terms of service. Click the Agree and Finish Signing button to confirm the application of the signature.
How to monitor the signing progress
A workflow manager can track the signing progress for each invited person by using the eSigner browser-based app.
- On your eSigner account, click Files.
- Search through your folders/files for the specific document you have sent out for signing. The signing status of the document will vary according to the following:
- Waiting for signatures: No signer has applied an eSigner signature
- Signing in progress: At least one signer has applied an eSigner signature
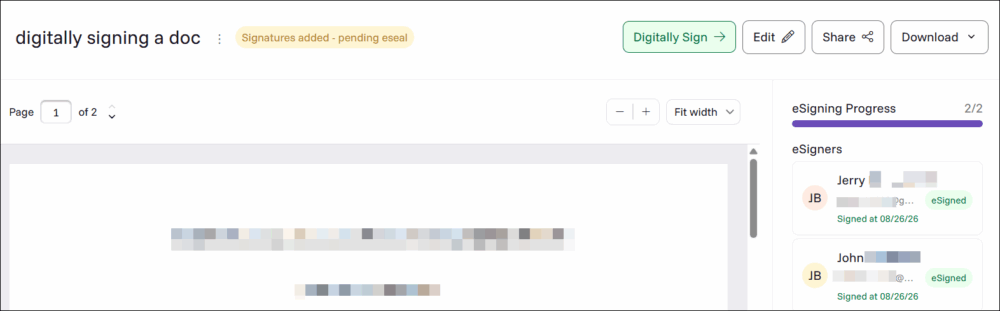
- Signature added –pending eseal: All invited persons have set their eSigner signatures but the signing manager needs to apply a digital signature to the signed file to be able to download it.
- Digitally signed: A digital signature has been successfully applied to the PDF using a document signing certificate from SSL.com
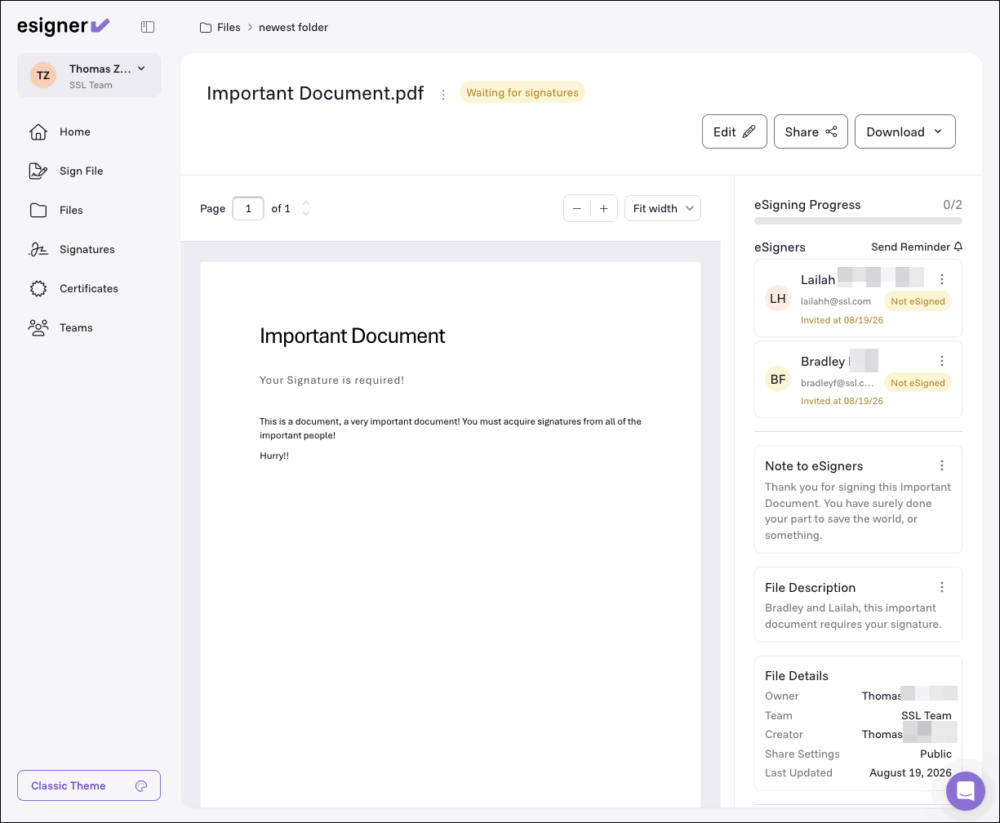
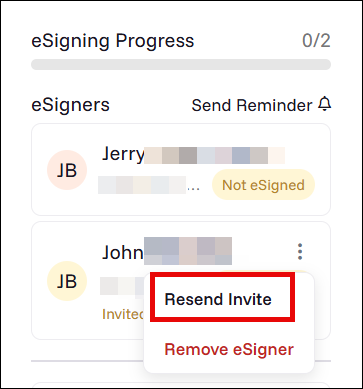
- If, for some reason, an invited signer is unable to locate the email with the link to the signing request, you can always use the eSigner app to resend the invitation. Do this by clicking the 3 dots icon and then select Resend Invite.
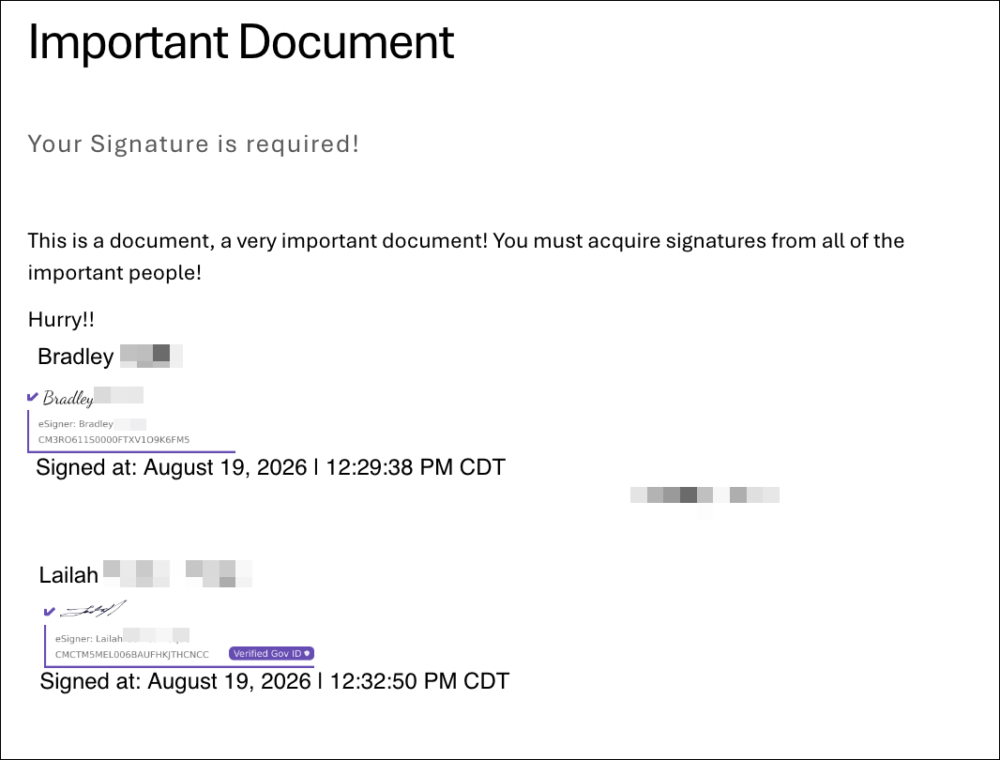
- You can inspect the fields you have set for each signer to view the accomplished signatures.
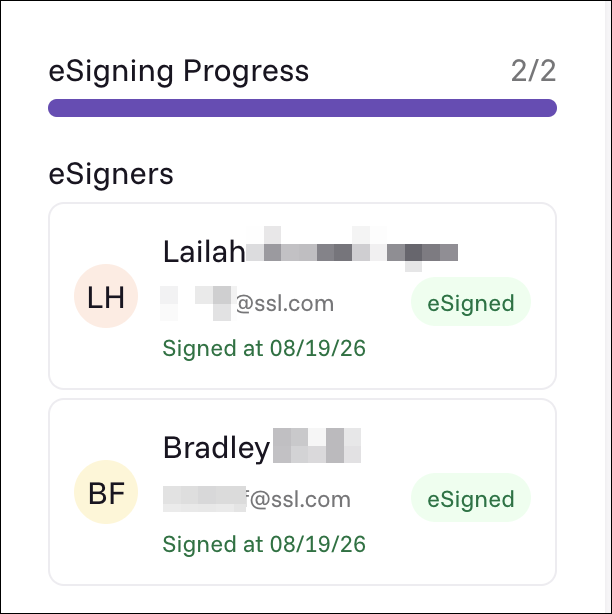
- When all required signatures have been collected from people invited, the status of the document will change to Signatures added – pending eseal. The eSigner progress bar will show completed, and the label eSigned will appear under each signatory.
Apply a Digital Signature to the File
Once all invited signers have completed their required annotations, the workflow manager is tasked to apply a digital signature to the PDF using an SSL.com Document Signing Certificate enrolled in the eSigner cloud document signing service. Unlike a basic electronic signature, a digital signature uses public key cryptography to protect the integrity of the document.
All types of Document Signing certificates enrolled in the eSigner cloud signing service can be used to digitally sign PDF documents. Once the file has been digitally signed, the workflow is concluded and the signed file can be downloaded. The completed PDF can then be shared with confidence that the digital signature applied to it can be used to verify the signer and detect subsequent changes to the document.
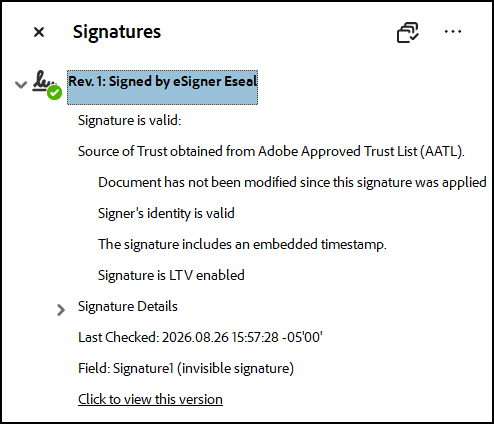
The resulting digital signature will not have a visible representation like the eSigner signatures collected from signing participants. However, it can be verified by opening the signed PDF with Adobe Acrobat Reader and viewing the Signature Panel as further explained below.
- On your eSigner account, click Files.
- Search through your folders/files for the specific document that needs to be digitally signed.
- Click the Digitally Sign button.
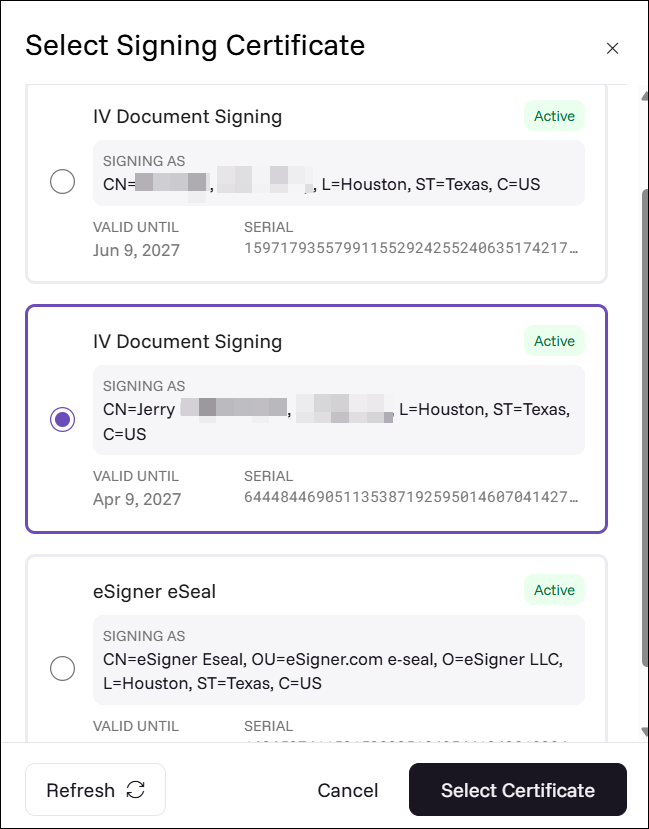
- If you have multiple document signing certificates issued in your SSL.com customer account and enrolled in the eSigner cloud signing service, they will all appear as options you can use to apply a digital signature.
If you do not have your own document signing certificate, eSigner app will automatically use the default eSigner eSeal certificate to digitally sign the document.
Click the radio button icon for the certificate you want to use. Afterward, click Select Certificate.
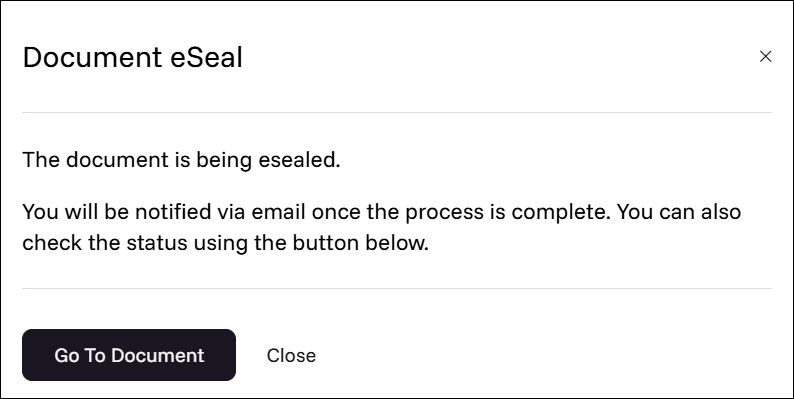
- A message box will appear indicating that the file is being digitally signed. Click Go To Document and wait a few seconds for the digital signing to be completed.
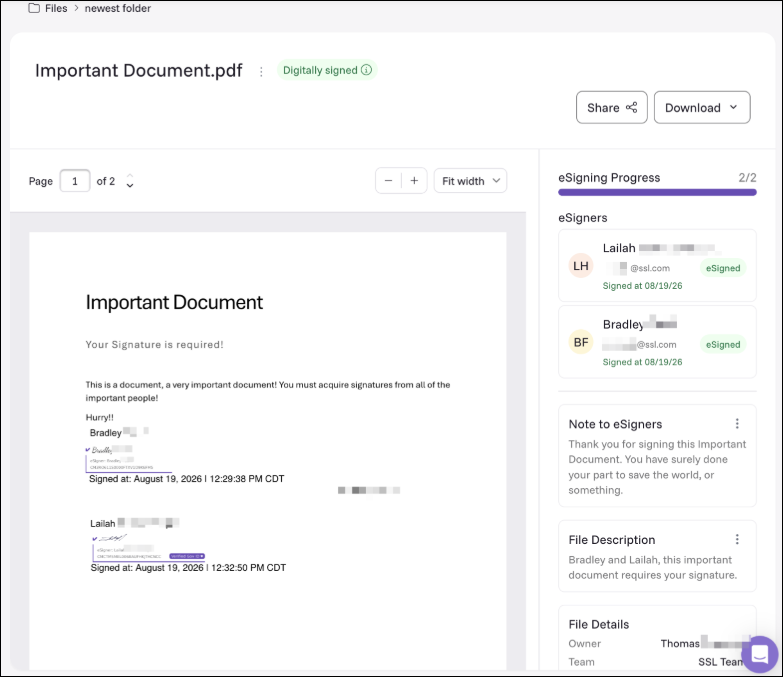
- Below is an example of a document with completed eSigner signatures from all participants and a digital signature applied to the file. The signing status shows Digitally signed to confirm such status.
Download the Digitally Signed Document
- On your eSigner account, click Files. Search through your folders/files for the document that has been completed for digital signing.
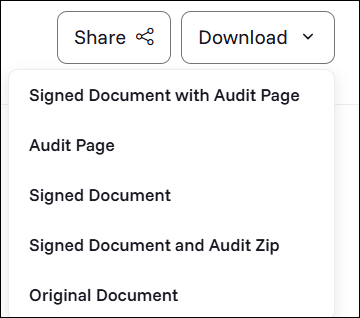
- Click the Download button and select the download format you want for the digitally signed file.
- Signed Document with Audit Page: Downloads a single PDF copy containing both the signed file and the Audit page.
- Audit Page: Downloads a PDF named Certificate of Signature and Timestamp which displays key information, including the name of the document owner; name of the document and date when it was created; details of the document signing certificate/s that were used; and names of all persons who applied their signatures on the file.
- Signed Document: Downloads a PDF copy of the signed file only.
- Signed Document and Audit Zip: Downloads a zip folder containing separate files for the signed document and the Audit page.

View the eSigner Signatures on Adobe Acrobat Reader
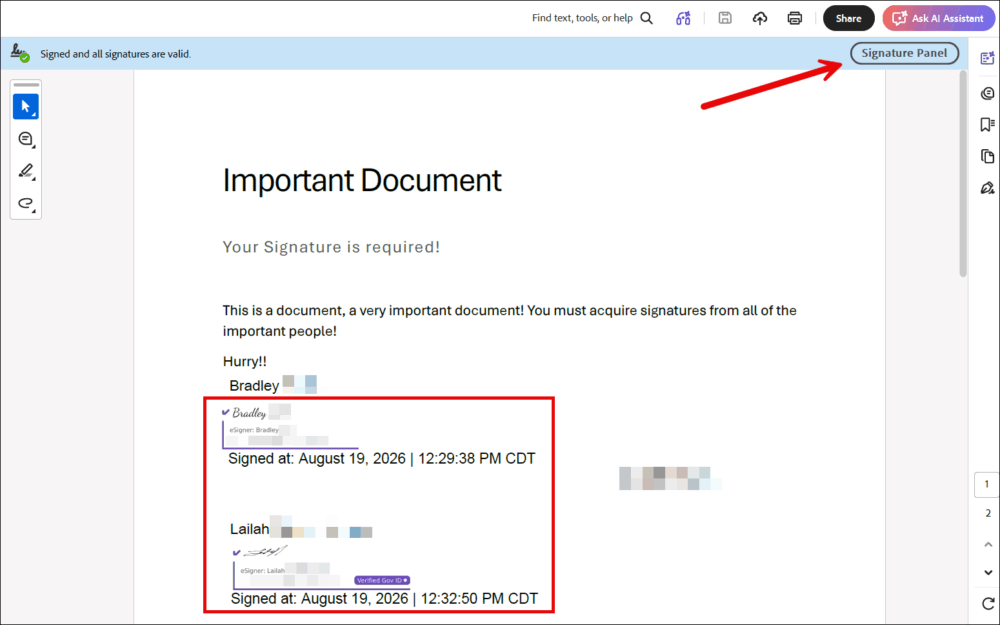
- On your computer, open the downloaded signed document with Acrobat Reader. The eSigner signatures collected from people you have invited will be displayed. Additionally, in a successful digital signing process, Acrobat Reader will display a message that confirms the authenticity of the digital signature: Signed and all signatures are valid. Click the Signature Panel button to confirm the certificate that was used to apply the digital signature.
- Click the arrow beside the name of the document signing certificate. You will be able to see that Adobe recognizes the security features acquired from digitally signing the PDF. These include the following:
The digital signature applied is valid.
The signer’s identity is valid.
The signature includes an embedded timestamp.
The document has not been modified since the signature was applied.